<?xml version="1.0" encoding="UTF-8"?>
<feed xmlns="http://www.w3.org/2005/Atom">

  <title>Articles tagged trick at null program</title>
  <link rel="alternate" type="text/html"
        href="https://nullprogram.com/tags/trick/"/>
  <link rel="self" type="application/atom+xml"
        href="https://nullprogram.com/tags/trick/feed/"/>
  <updated>2026-04-09T13:25:45Z</updated>
  <id>urn:uuid:a2a6e1b2-9a41-443c-83ab-c457836a1a5d</id>

  <author>
    <name>Christopher Wellons</name>
    <uri>https://nullprogram.com</uri>
    <email>wellons@nullprogram.com</email>
  </author>


  <entry>
    <title>Protecting paths in macro expansions by extending UTF-8</title>
    <link rel="alternate" type="text/html" href="https://nullprogram.com/blog/2024/03/05/"/>
    <id>urn:uuid:92065961-7687-4618-bd78-e4442041f2e4</id>
    <updated>2024-03-05T03:15:12Z</updated>
    <category term="c"/><category term="trick"/>
    <content type="html">
      <![CDATA[<p>After a year I’ve finally came up with an elegant solution to a vexing
<a href="/blog/2023/01/18/">u-config</a> problem. The pkg-config format uses macros to generate build
flags through recursive expansion. Some flags embed file system paths, but
to the macro system it’s all strings. The output is also ultimately just
one big string, which the receiving shell <a href="https://pubs.opengroup.org/onlinepubs/9699919799/utilities/V3_chap02.html#tag_18_06_05">splits into fields</a>. If
a path contains spaces, or shell metacharacters, u-config must escape them
so that shells treat them as part of a token. But how can u-config itself
distinguish incidental spaces in paths from deliberate spaces between
flags? What about other shell metacharacters in paths? My solution is to
extend UTF-8 to encode metadata that survives macro expansion.</p>

<p>As usual, it helps to begin with a concrete example of the problem. The
following is a conventional <code class="language-plaintext highlighter-rouge">.pc</code> file much like you’d  find on your own
system:</p>

<pre><code class="language-pc">prefix=/usr
exec_prefix=${prefix}
libdir=${exec_prefix}/lib
includedir=${prefix}/include

Name: Example
Version: 1.0
Description: An example .pc file
Cflags: -I${includedir}
Libs: -L${libdir} -lexample
</code></pre>

<p>It begins by defining the library’s installation prefix from which it
derives additional paths, which are finally used in the package fields
that generate build flags (<code class="language-plaintext highlighter-rouge">Cflags</code>, <code class="language-plaintext highlighter-rouge">Libs</code>). If I run u-config against
this configuration:</p>

<div class="language-plaintext highlighter-rouge"><div class="highlight"><pre class="highlight"><code>$ pkg-config --cflags --libs example
-I/usr/include -L/usr/lib -lexample
</code></pre></div></div>

<p>Typically <code class="language-plaintext highlighter-rouge">prefix</code> is populated by the library’s build system, which knows
where the library is to be installed. In some situations that’s not
possible, and there is no opportunity to set <code class="language-plaintext highlighter-rouge">prefix</code> to a meaningful
path. In that case, pkg-config can automatically override it
(<code class="language-plaintext highlighter-rouge">--define-prefix</code>) with a path relative to the <code class="language-plaintext highlighter-rouge">.pc</code> file, making the
installation relocatable. This works quite well <a href="/blog/2020/09/25/">on Windows, where it’s
the default</a>:</p>

<div class="language-plaintext highlighter-rouge"><div class="highlight"><pre class="highlight"><code>$ pkg-config --cflags --libs example
-IC:/Users/me/example/include -LC:/Users/me/example/lib -lexample
</code></pre></div></div>

<p>This just works… <em>so long as the path does not contain spaces</em>. If so, it
risks splitting into separate fields. The <code class="language-plaintext highlighter-rouge">.pc</code> format supports quoting to
control how such output is escaped. Regions between quotes are escaped in
the output so that they retain their spaces when field split in the shell.
If a <code class="language-plaintext highlighter-rouge">.pc</code> file author is careful, they’d write it with quotes:</p>

<pre><code class="language-pc">Cflags: -I"${includedir}"
Libs: -L"${libdir}" -lexample
</code></pre>

<p>The paths are carefully placed within <a href="/blog/2021/12/04/">quoted regions</a> so that they
come out properly:</p>

<div class="language-plaintext highlighter-rouge"><div class="highlight"><pre class="highlight"><code>$ pkg-config --cflags example
-IC:/Program\ Files/example/include
</code></pre></div></div>

<p><em>Almost nobody writes their <code class="language-plaintext highlighter-rouge">.pc</code> files this way</em>! The convention is not
to quote. My original solution was to implicitly wrap <code class="language-plaintext highlighter-rouge">prefix</code> in quotes
on assignment, which fixes the vast majority of <code class="language-plaintext highlighter-rouge">.pc</code> files. That
effectively looks like this in the “virtual” <code class="language-plaintext highlighter-rouge">.pc</code> file:</p>

<pre><code class="language-pc">prefix="C:/Program Files/example"
exec_prefix=${prefix}
libdir=${exec_prefix}/lib
includedir=${prefix}/include
</code></pre>

<p>So the important region is quoted, its spaces preserved. However, the
occasional library author actively supporting Windows inevitably runs into
this problem, and their system’s pkg-config implementation does not quote
<code class="language-plaintext highlighter-rouge">prefix</code>. They soon figure out explicit quoting and apply it, which then
undermines u-config’s implicit quoting. The quotes essentially cancel out:</p>

<div class="language-plaintext highlighter-rouge"><div class="highlight"><pre class="highlight"><code>"$includedir" -&gt; ""C:/Program Files/example"/include"
</code></pre></div></div>

<p>The quoted regions are inverted and nothing happens. Though this is a
small minority, the libraries that do this and the ones you’re likely to
use on Windows are correlated. I was stumped: How to support quoted and
unquoted <code class="language-plaintext highlighter-rouge">.pc</code> files simultaneously?</p>

<h3 id="extending-utf-8">Extending UTF-8</h3>

<p>I recently had the thought: What if somehow u-config tracked which spans
of string were paths. <code class="language-plaintext highlighter-rouge">prefix</code> is initially a path span, and then track it
through macro-expansion and concatenation. Soon after that I realized it’s
even simpler: <strong>Encode the spaces in a path as a value other than space</strong>,
but also a value that cannot appear in the input. Recall that <a href="/blog/2017/10/06/">certain
octets can never appear in UTF-8 text</a>: the 8 values whose highest 5
bits are set. That would be the first octet of 5-octet, or longer, code
point, but those are forbidden.</p>

<div class="language-plaintext highlighter-rouge"><div class="highlight"><pre class="highlight"><code>11111xxx
</code></pre></div></div>

<p>When paths enter the macro system, special characters are encoded as one
of these 8 values. They’re converted back to their original ASCII values
during output encoding, escaped. It doesn’t interact with the pkg-config
quoting mechanism, so there’s no quote cancellation. Both quoting cases
are supported equally.</p>

<p>For example, if space is mapped onto <code class="language-plaintext highlighter-rouge">\xff</code> (255), then:</p>

<div class="language-plaintext highlighter-rouge"><div class="highlight"><pre class="highlight"><code>in:  C:/Program Files/foo    -&gt; C:/Program\xffFiles/foo
out: C:/Program\xffFiles/foo -&gt; C:/Program\ Files/foo
</code></pre></div></div>

<p>Which prints the same regardless of <code class="language-plaintext highlighter-rouge">${includedir}</code> or <code class="language-plaintext highlighter-rouge">"${includedir}"</code>.
Problem solved!</p>

<h3 id="more-metacharacters">More metacharacters</h3>

<p>That’s not the only complication. Outputs may <em>deliberately</em> include shell
metacharacters, though typically these are <a href="/blog/2017/08/20/">Makefile</a> fragments. For
example, the default value of <code class="language-plaintext highlighter-rouge">${pc_top_builddir}</code> is <code class="language-plaintext highlighter-rouge">$(top_builddir)</code>,
which <code class="language-plaintext highlighter-rouge">make</code> will later expand. While these characters are special to a
shell, and certainly special to <code class="language-plaintext highlighter-rouge">make</code>, they must not be escaped.</p>

<p>What if a path contains these characters? The pkg-config quoting mechanism
won’t help. It’s only concerned with spaces, and <code class="language-plaintext highlighter-rouge">$(...)</code> prints the same
quoted nor not. As before, u-config must track provenance — whether or not
such characters originated from a path.</p>

<p>If <code class="language-plaintext highlighter-rouge">$PKG_CONFIG_TOP_BUILD_DIR</code> is set, then <code class="language-plaintext highlighter-rouge">pc_top_builddir</code> is set to
this environment variable, useful when the result isn’t processed by
<code class="language-plaintext highlighter-rouge">make</code>. In this case it’s a path, and <code class="language-plaintext highlighter-rouge">$(...)</code> ought to be escaped. Even
without <code class="language-plaintext highlighter-rouge">$</code> it must be quoted, because the parentheses would still invoke
a subshell. But who would put parenthesis in a path? Lo and behold!</p>

<div class="language-plaintext highlighter-rouge"><div class="highlight"><pre class="highlight"><code>C:/Program Files (x86)/example
</code></pre></div></div>

<p>Again, extending UTF-8 solves this as well: Encode <code class="language-plaintext highlighter-rouge">$</code>, <code class="language-plaintext highlighter-rouge">(</code>, and <code class="language-plaintext highlighter-rouge">)</code> in
paths using three of those forbidden octets, and escape them on the way
out, allowing unencoded instances to go straight through.</p>

<div class="language-plaintext highlighter-rouge"><div class="highlight"><pre class="highlight"><code>in:  C:/Program\xffFiles\xff\xfdx86\xfe/example
out: C:/Program\ Files\ \(x86\)/example
</code></pre></div></div>

<p>This makes <code class="language-plaintext highlighter-rouge">pc_top_builddir</code> straightforward: default to a raw string,
otherwise a path-encoded environment variable (note: <code class="language-plaintext highlighter-rouge">s8</code> <a href="/blog/2023/10/08/">is a string
type</a> and <code class="language-plaintext highlighter-rouge">upsert</code> is <a href="/blog/2023/09/30/">a hash map</a>):</p>

<div class="language-c highlighter-rouge"><div class="highlight"><pre class="highlight"><code>    <span class="n">s8</span> <span class="n">top_builddir</span> <span class="o">=</span> <span class="n">s8</span><span class="p">(</span><span class="s">"$(top_builddir)"</span><span class="p">);</span>
    <span class="k">if</span> <span class="p">(</span><span class="n">envvar_set</span><span class="p">)</span> <span class="p">{</span>
        <span class="n">top_builddir</span> <span class="o">=</span> <span class="n">s8pathencode</span><span class="p">(</span><span class="n">envvar</span><span class="p">,</span> <span class="n">perm</span><span class="p">);</span>
    <span class="p">}</span>
    <span class="o">*</span><span class="n">upsert</span><span class="p">(</span><span class="o">&amp;</span><span class="n">global</span><span class="p">,</span> <span class="n">s8</span><span class="p">(</span><span class="s">"pc_top_builddir"</span><span class="p">),</span> <span class="n">perm</span><span class="p">)</span> <span class="o">=</span> <span class="n">top_builddir</span><span class="p">;</span>
</code></pre></div></div>

<p>For a particularly wild case, consider deliberately using a <code class="language-plaintext highlighter-rouge">uname -m</code>
command substitution to construct a path, i.e. the path contains the
target machine architecture (<code class="language-plaintext highlighter-rouge">i686</code>, <code class="language-plaintext highlighter-rouge">x86_64</code>, etc.):</p>

<pre><code class="language-pc">Cflags: -I${prefix}/$(uname -m)/include
</code></pre>

<p>(Not that condone such nonsense. This is merely a reality of real world
<code class="language-plaintext highlighter-rouge">.pc</code> files.) With <code class="language-plaintext highlighter-rouge">prefix</code> automatically set as above, this will print:</p>

<div class="language-plaintext highlighter-rouge"><div class="highlight"><pre class="highlight"><code>-IC:/Program\ Files\ \(x86\)/example/$(uname -m)/include
</code></pre></div></div>

<p>Path parentheses are escaped because they came from a path, but command
substitution passes through because it came from the <code class="language-plaintext highlighter-rouge">.pc</code> source. Quite
cool!</p>

]]>
    </content>
  </entry>


  <entry>
    <title>Test cross-architecture without leaving home</title>
    <link rel="alternate" type="text/html" href="https://nullprogram.com/blog/2021/08/21/"/>
    <id>urn:uuid:ac34f8a0-af73-4301-b21b-5a47d48e3069</id>
    <updated>2021-08-21T23:59:33Z</updated>
    <category term="c"/><category term="go"/><category term="debian"/><category term="trick"/>
    <content type="html">
      <![CDATA[<p>I like to test my software across different environments, on <a href="/blog/2020/05/15/">strange
platforms</a>, and with <a href="/blog/2018/04/13/">alternative implementations</a>. Each has its
own quirks and oddities that can shake bugs out earlier. C is particularly
good at this since it has such a wide selection of compilers and runs on
everything. For instance I count at least 7 distinct C compilers in Debian
alone. One advantage of <a href="/blog/2017/03/30/">writing portable software</a> is access to a
broader testing environment, and it’s one reason I prefer to target
standards rather than specific platforms.</p>

<p>However, I’ve long struggled with architecture diversity. My work and
testing has been almost entirely on x86, with ARM as a distant second
(Raspberry Pi and friends). Big endian hosts are particularly rare.
However, I recently learned a trick for quickly and conveniently accessing
many different architectures without even leaving my laptop: <a href="https://wiki.debian.org/QemuUserEmulation">QEMU User
Emulation</a>. Debian and its derivatives support this very well and
require almost no setup or configuration.</p>

<!--more-->

<h3 id="cross-compilation-example">Cross-compilation Example</h3>

<p>While there are many options, my main cross-testing architecture has been
PowerPC. It’s 32-bit big endian, while I’m generally working on 64-bit
little endian, which is exactly the sort of mismatch I’m going for. I use
a Debian-supplied cross-compiler and qemu-user tools. The <a href="https://en.wikipedia.org/wiki/Binfmt_misc">binfmt</a>
support is especially slick, so that’s how I usually use it.</p>

<div class="language-plaintext highlighter-rouge"><div class="highlight"><pre class="highlight"><code># apt install gcc-powerpc-linux-gnu qemu-user-binfmt
</code></pre></div></div>

<p><code class="language-plaintext highlighter-rouge">binfmt_misc</code> is a kernel module that teaches Linux how to recognize
arbitrary binary formats. For instance, there’s a Wine binfmt so that
Linux programs can transparently <code class="language-plaintext highlighter-rouge">exec(3)</code> Windows <code class="language-plaintext highlighter-rouge">.exe</code> binaries. In the
case of QEMU User Mode, binaries for foreign architectures are loaded into
a QEMU virtual machine configured in user mode. In user mode there’s no
guest operating system, and instead the virtual machine translates guest
system calls to the host operating system.</p>

<p>The first package gives me <code class="language-plaintext highlighter-rouge">powerpc-linux-gnu-gcc</code>. The prefix is the
<a href="https://wiki.debian.org/Multiarch/Tuples">architecture tuple</a> describing the instruction set and system ABI.
To try this out, I have a little test program that inspects its execution
environment:</p>

<div class="language-c highlighter-rouge"><div class="highlight"><pre class="highlight"><code><span class="cp">#include</span> <span class="cpf">&lt;stdio.h&gt;</span><span class="cp">
</span>
<span class="kt">int</span> <span class="nf">main</span><span class="p">(</span><span class="kt">void</span><span class="p">)</span>
<span class="p">{</span>
    <span class="kt">char</span> <span class="o">*</span><span class="n">w</span> <span class="o">=</span> <span class="s">"?"</span><span class="p">;</span>
    <span class="k">switch</span> <span class="p">(</span><span class="k">sizeof</span><span class="p">(</span><span class="kt">void</span> <span class="o">*</span><span class="p">))</span> <span class="p">{</span>
    <span class="k">case</span> <span class="mi">1</span><span class="p">:</span> <span class="n">w</span> <span class="o">=</span> <span class="s">"8"</span><span class="p">;</span>  <span class="k">break</span><span class="p">;</span>
    <span class="k">case</span> <span class="mi">2</span><span class="p">:</span> <span class="n">w</span> <span class="o">=</span> <span class="s">"16"</span><span class="p">;</span> <span class="k">break</span><span class="p">;</span>
    <span class="k">case</span> <span class="mi">4</span><span class="p">:</span> <span class="n">w</span> <span class="o">=</span> <span class="s">"32"</span><span class="p">;</span> <span class="k">break</span><span class="p">;</span>
    <span class="k">case</span> <span class="mi">8</span><span class="p">:</span> <span class="n">w</span> <span class="o">=</span> <span class="s">"64"</span><span class="p">;</span> <span class="k">break</span><span class="p">;</span>
    <span class="p">}</span>

    <span class="kt">char</span> <span class="o">*</span><span class="n">b</span> <span class="o">=</span> <span class="s">"?"</span><span class="p">;</span>
    <span class="k">switch</span> <span class="p">(</span><span class="o">*</span><span class="p">(</span><span class="kt">char</span> <span class="o">*</span><span class="p">)(</span><span class="kt">int</span> <span class="p">[]){</span><span class="mi">1</span><span class="p">})</span> <span class="p">{</span>
    <span class="k">case</span> <span class="mi">0</span><span class="p">:</span> <span class="n">b</span> <span class="o">=</span> <span class="s">"big"</span><span class="p">;</span>    <span class="k">break</span><span class="p">;</span>
    <span class="k">case</span> <span class="mi">1</span><span class="p">:</span> <span class="n">b</span> <span class="o">=</span> <span class="s">"little"</span><span class="p">;</span> <span class="k">break</span><span class="p">;</span>
    <span class="p">}</span>

    <span class="n">printf</span><span class="p">(</span><span class="s">"%s-bit, %s endian</span><span class="se">\n</span><span class="s">"</span><span class="p">,</span> <span class="n">w</span><span class="p">,</span> <span class="n">b</span><span class="p">);</span>
<span class="p">}</span>
</code></pre></div></div>

<p>When I run this natively on x86-64:</p>

<div class="language-plaintext highlighter-rouge"><div class="highlight"><pre class="highlight"><code>$ gcc test.c
$ ./a.out
64-bit, little endian
</code></pre></div></div>

<p>Running it on PowerPC via QEMU:</p>

<div class="language-plaintext highlighter-rouge"><div class="highlight"><pre class="highlight"><code>$ powerpc-linux-gnu-gcc -static test.c
$ ./a.out
32-bit, big endian
</code></pre></div></div>

<p>Thanks to binfmt, I could execute it as though the PowerPC binary were a
native binary. With just a couple of environment variables in the right
place, I could pretend I’m developing on PowerPC — aside from emulation
performance penalties of course.</p>

<p>However, you might have noticed I pulled a sneaky on ya: <code class="language-plaintext highlighter-rouge">-static</code>. So far
what I’ve shown only works with static binaries. There’s no dynamic loader
available to run dynamically-linked binaries. Fortunately this is easy to
fix in two steps. The first step is to install the dynamic linker for
PowerPC:</p>

<div class="language-plaintext highlighter-rouge"><div class="highlight"><pre class="highlight"><code># apt install libc6-powerpc-cross
</code></pre></div></div>

<p>The second is to tell QEMU where to find it since, unfortunately, it
cannot currently do so on its own.</p>

<div class="language-plaintext highlighter-rouge"><div class="highlight"><pre class="highlight"><code>$ export QEMU_LD_PREFIX=/usr/powerpc-linux-gnu
</code></pre></div></div>

<p>Now I can leave out the <code class="language-plaintext highlighter-rouge">-static</code>:</p>

<div class="language-plaintext highlighter-rouge"><div class="highlight"><pre class="highlight"><code>$ powerpc-linux-gnu-gcc test.c
$ ./a.out
32-bit, big endian
</code></pre></div></div>

<p>A practical example: Remember <a href="https://github.com/skeeto/binitools">binitools</a>? I’m now ready to run its
<a href="/blog/2019/01/25/">fuzz-generated test suite</a> on this cross-testing platform.</p>

<div class="language-plaintext highlighter-rouge"><div class="highlight"><pre class="highlight"><code>$ git clone https://github.com/skeeto/binitools
$ cd binitools/
$ make check CC=powerpc-linux-gnu-gcc
...
PASS: 668/668
</code></pre></div></div>

<p>Or if I’m going to be running <code class="language-plaintext highlighter-rouge">make</code> often:</p>

<div class="language-plaintext highlighter-rouge"><div class="highlight"><pre class="highlight"><code>$ export CC=powerpc-linux-gnu-gcc
$ make -e check
</code></pre></div></div>

<p>Recall: <a href="/blog/2017/08/20/">make’s <code class="language-plaintext highlighter-rouge">-e</code> flag</a> passes the environment through, so I
don’t need to pass <code class="language-plaintext highlighter-rouge">CC=...</code> on the command line each time.</p>

<p>When setting up a test suite for your own programs, consider how difficult
it would be to run the tests under customized circumstances like this. The
easier it is to run your tests, the more they’re going to be run. I’ve run
into many projects with such overly-complex test builds that even enabling
sanitizers in the tests suite was a pain, let alone cross-architecture
testing.</p>

<p>Dependencies? There might be a way to use <a href="https://wiki.debian.org/Multiarch/HOWTO">Debian’s multiarch support</a>
to install these packages, but I haven’t been able to figure it out. You
likely need to build dependencies yourself using the cross compiler.</p>

<h3 id="testing-with-go">Testing with Go</h3>

<p>None of this is limited to C (or even C++). I’ve also successfully used
this to test Go libraries and programs cross-architecture. This isn’t
nearly as important since it’s harder to write unportable Go than C — e.g.
<a href="https://commandcenter.blogspot.com/2012/04/byte-order-fallacy.html">dumb pointer tricks</a> are literally labeled “unsafe”. However, Go
(gc) trivializes cross-compilation and is statically compiled, so it’s
incredibly simple. Once you’ve installed <code class="language-plaintext highlighter-rouge">qemu-user-binfmt</code> it’s entirely
transparent:</p>

<div class="language-plaintext highlighter-rouge"><div class="highlight"><pre class="highlight"><code>$ GOARCH=mips64 go test
</code></pre></div></div>

<p>That’s all there is to cross-platform testing. If for some reason binfmt
doesn’t work (WSL) or you don’t want to install it, there’s just one extra
step (package named <code class="language-plaintext highlighter-rouge">example</code>):</p>

<div class="language-plaintext highlighter-rouge"><div class="highlight"><pre class="highlight"><code>$ GOARCH=mips64 go test -c
$ qemu-mips64-static example.test
</code></pre></div></div>

<p>The <code class="language-plaintext highlighter-rouge">-c</code> option builds a test binary but doesn’t run it, instead allowing
you to choose where and how to run it.</p>

<p>It even works <a href="/blog/2021/06/29/">with cgo</a> — if you’re willing to jump through the same
hoops as with C of course:</p>

<div class="language-go highlighter-rouge"><div class="highlight"><pre class="highlight"><code><span class="k">package</span> <span class="n">main</span>

<span class="c">// #include &lt;stdint.h&gt;</span>
<span class="c">// uint16_t v = 0x1234;</span>
<span class="c">// char *hi = (char *)&amp;v + 0;</span>
<span class="c">// char *lo = (char *)&amp;v + 1;</span>
<span class="k">import</span> <span class="s">"C"</span>
<span class="k">import</span> <span class="s">"fmt"</span>

<span class="k">func</span> <span class="n">main</span><span class="p">()</span> <span class="p">{</span>
	<span class="n">fmt</span><span class="o">.</span><span class="n">Printf</span><span class="p">(</span><span class="s">"%02x %02x</span><span class="se">\n</span><span class="s">"</span><span class="p">,</span> <span class="o">*</span><span class="n">C</span><span class="o">.</span><span class="n">hi</span><span class="p">,</span> <span class="o">*</span><span class="n">C</span><span class="o">.</span><span class="n">lo</span><span class="p">)</span>
<span class="p">}</span>
</code></pre></div></div>

<p>With <code class="language-plaintext highlighter-rouge">go run</code> on x86-64:</p>

<div class="language-plaintext highlighter-rouge"><div class="highlight"><pre class="highlight"><code>$ CGO_ENABLED=1 go run example.go
34 12
</code></pre></div></div>

<p>Via QEMU User Mode:</p>

<div class="language-plaintext highlighter-rouge"><div class="highlight"><pre class="highlight"><code>$ export CGO_ENABLED=1
$ export GOARCH=mips64
$ export CC=mips64-linux-gnuabi64-gcc
$ export QEMU_LD_PREFIX=/usr/mips64-linux-gnuabi64
$ go run example.go
12 34
</code></pre></div></div>

<p>I was pleasantly surprised how well this all works.</p>

<h3 id="one-dimension">One dimension</h3>

<p>Despite the variety, all these architectures are still “running” the same
operating system, Linux, and so they only vary on one dimension. For most
programs primarily targeting x86-64 Linux, PowerPC Linux is practically
the same thing, while x86-64 OpenBSD is foreign territory despite sharing
an architecture and ABI (<a href="/blog/2016/11/17/">System V</a>). Testing across operating
systems still requires spending the time to install, configure, and
maintain these extra hosts. That’s an article for another time.</p>

]]>
    </content>
  </entry>


  <entry>
    <title>Well-behaved alias commands on Windows</title>
    <link rel="alternate" type="text/html" href="https://nullprogram.com/blog/2021/02/08/"/>
    <id>urn:uuid:d1c90d96-3696-4183-a52b-b10598a630c7</id>
    <updated>2021-02-08T20:32:45Z</updated>
    <category term="c"/><category term="cpp"/><category term="win32"/><category term="trick"/>
    <content type="html">
      <![CDATA[<p>Since its inception I’ve faced a dilemma with <a href="https://github.com/skeeto/w64devkit">w64devkit</a>, my
<a href="/blog/2020/09/25/">all-in-one</a> Mingw-w64 toolchain and <a href="/blog/2020/05/15/">development environment
distribution for Windows</a>. A major goal of the project is no
installation: unzip anywhere and it’s ready to go as-is. However, full
functionality requires alias commands, particularly for BusyBox applets,
and the usual solutions are neither available nor viable. It seemed that
an installer was needed to assemble this last puzzle piece. This past
weekend I finally discovered a tidy and complete solution that solves this
problem for good.</p>

<p>That solution is a small C source file, <a href="https://github.com/skeeto/w64devkit/blob/master/src/alias.c"><code class="language-plaintext highlighter-rouge">alias.c</code></a>. This article is
about why it’s necessary and how it works.</p>

<h3 id="hard-and-symbolic-links">Hard and symbolic links</h3>

<p>Some alias commands are for convenience, such as a <code class="language-plaintext highlighter-rouge">cc</code> alias for <code class="language-plaintext highlighter-rouge">gcc</code> so
that build systems need not assume any particular C compiler. Others are
essential, such as an <code class="language-plaintext highlighter-rouge">sh</code> alias for “<code class="language-plaintext highlighter-rouge">busybox sh</code>” so that it’s available
as a shell for <code class="language-plaintext highlighter-rouge">make</code>. These aliases are usually created with links, hard
or symbolic. A GCC installation might include (roughly) a symbolic link
created like so:</p>

<div class="language-sh highlighter-rouge"><div class="highlight"><pre class="highlight"><code><span class="nb">ln</span> <span class="nt">-s</span> gcc cc
</code></pre></div></div>

<p>BusyBox looks at its <code class="language-plaintext highlighter-rouge">argv[0]</code> on startup, and if it names an applet
(<code class="language-plaintext highlighter-rouge">ls</code>, <code class="language-plaintext highlighter-rouge">sh</code>, <code class="language-plaintext highlighter-rouge">awk</code>, etc.), it behaves like that applet. Typically BusyBox
aliases are installed as hard links to the original binary, and there’s
even a <code class="language-plaintext highlighter-rouge">busybox --install</code> to set these up. Both kinds of aliases are
cheap and effective.</p>

<div class="language-sh highlighter-rouge"><div class="highlight"><pre class="highlight"><code><span class="nb">ln </span>busybox sh
<span class="nb">ln </span>busybox <span class="nb">ls
ln </span>busybox <span class="nb">awk</span>
</code></pre></div></div>

<p>Unfortunately links are not supported by .zip files on Windows. They’d
need to be created by a dedicated installer. As a result, I’ve strongly
recommended that users run “<code class="language-plaintext highlighter-rouge">busybox --install</code>” at some point to
establish the BusyBox alias commands. While w64devkit works without them,
it works better with them. Still, that’s an installation step!</p>

<p>An alternative option is to simply include a full copy of the BusyBox
binary for each applet — all 150 of them — simulating hard links. BusyBox
is small, around 4kB per applet on average, but it’s not quite <em>that</em>
small. Since the .zip format doesn’t use block compression — files are
compressed individually — this duplication will appear in the .zip itself.
My 573kB BusyBox build duplicated 150 times would double the distribution
size and increase the installation footprint by 25%. It’s not worth the
cost.</p>

<p>Since .zip is so limited, perhaps I should use a different distribution
format that supports links. However, another w64devkit goal is making no
assumptions about what other tools are installed. Windows natively
supports .zip, even if that support isn’t so great (poor performance, low
composability, missing features, etc.). With nothing more than the
w64devkit .zip on a fresh, offline Windows installation, you can begin
efficiently developing professional, native applications in under a
minute.</p>

<h3 id="scripts-as-aliases">Scripts as aliases</h3>

<p>With links off the table, the next best option is a shell script. On
unix-like systems shell scripts are an effective tool for creating complex
alias commands. Unlike links, they can manipulate the argument list. For
instance, w64devkit includes a <code class="language-plaintext highlighter-rouge">c99</code> alias to invoke the C compiler
configured to use the C99 standard. To do this with a shell script:</p>

<div class="language-sh highlighter-rouge"><div class="highlight"><pre class="highlight"><code><span class="c">#!/bin/sh</span>
<span class="nb">exec </span>cc <span class="nt">-std</span><span class="o">=</span>c99 <span class="s2">"</span><span class="nv">$@</span><span class="s2">"</span>
</code></pre></div></div>

<p>This prepends <code class="language-plaintext highlighter-rouge">-std=c99</code> to the argument list and passes through the rest
untouched via the Bourne shell’s special case <code class="language-plaintext highlighter-rouge">"$@"</code>. Because I used
<code class="language-plaintext highlighter-rouge">exec</code>, the shell process <em>becomes</em> the compiler in place. The shell
doesn’t hang around in the background. It’s just gone. This really quite
elegant and powerful.</p>

<p>The closest available on Windows is a .bat batch file. However, like some
other parts of DOS and Windows, the Batch language was designed as though
its designer once glimpsed at someone using a unix shell, perhaps looking
over their shoulder, then copied some of the ideas without understanding
them. As a result, it’s not nearly as useful or powerful. Here’s the Batch
equivalent:</p>

<div class="language-bat highlighter-rouge"><div class="highlight"><pre class="highlight"><code>@cc <span class="na">-std</span><span class="o">=</span><span class="kd">c99</span> <span class="err">%</span><span class="o">*</span>
</code></pre></div></div>

<p>The <code class="language-plaintext highlighter-rouge">@</code> is necessary because Batch prints its commands by default (Bourne
shell’s <code class="language-plaintext highlighter-rouge">-x</code> option), and <code class="language-plaintext highlighter-rouge">@</code> disables it. Windows lacks the concept of
<code class="language-plaintext highlighter-rouge">exec(3)</code>, so Batch file interpreter <code class="language-plaintext highlighter-rouge">cmd.exe</code> continues running alongside
the compiler. A little wasteful but that hardly matters. What does matter
though is that <code class="language-plaintext highlighter-rouge">cmd.exe</code> doesn’t behave itself! If you, say, Ctrl+C to
cancel compilation, you will get the infamous “Terminate batch job (Y/N)?”
prompt which interferes with other programs running in the same console.
The so-called “batch” script isn’t a batch job at all: It’s interactive.</p>

<p>I tried to use Batch files for BusyBox applets, but this issue came up
constantly and made this approach impractical. Nearly all BusyBox applets
are non-interactive, and lots of things break when they aren’t. Worst of
all, you can easily end up with layers of <code class="language-plaintext highlighter-rouge">cmd.exe</code> clobbering each other
to ask if they should terminate. It was frustrating.</p>

<p>The prompt is hardcoded in <code class="language-plaintext highlighter-rouge">cmd.exe</code> and cannot be disabled. Since so much
depends on <code class="language-plaintext highlighter-rouge">cmd.exe</code> remaining exactly the way it is, Microsoft will never
alter this behavior either. After all, that’s why they made PowerShell a
new, separate tool.</p>

<p>Speaking of PowerShell, could we use that instead? Unfortunately not:</p>

<ol>
  <li>
    <p>It’s installed by default on Windows, but is not necessarily enabled.
One of my own use cases for w64devkit involves systems where PowerShell
is disabled by policy. A common policy is it can be used interactively
but not run scripts (“Running scripts is disabled on this system”).</p>
  </li>
  <li>
    <p>PowerShell is not a first class citizen on Windows, and will likely
never be. Even under the friendliest policy it’s not normally possible
to put a PowerShell script on the <code class="language-plaintext highlighter-rouge">PATH</code> and run it by name. (I’m sure
there are ways to make this work via system-wide configuration, but
that’s off the table.)</p>
  </li>
  <li>
    <p>Everything in PowerShell is broken. For example, it does not support
input redirection with files, and instead you must use the <code class="language-plaintext highlighter-rouge">cat</code>-like
command, <code class="language-plaintext highlighter-rouge">Get-Content</code>, to pipe file contents. However, <code class="language-plaintext highlighter-rouge">Get-Content</code>
translates its input and quietly damages your data. There is no way to
disable this “feature” in the version of PowerShell that ships with
Windows, meaning it cannot accomplish the simplest of tasks. This is
just one of many ways that PowerShell is broken beyond usefulness.</p>
  </li>
</ol>

<p>Item (2) also affects w64devkit. It has a Bourne shell, but shell scripts
are still not first class citizens since Windows doesn’t know what to do
with them. Fixing would require system-wide configuration, antithetical to
the philosophy of the project.</p>

<h3 id="solution-compiled-shell-scripts">Solution: compiled shell “scripts”</h3>

<p>My working solution is inspired by an insanely clever hack used by my
favorite media player, <a href="https://mpv.io/">mpv</a>. The Windows build is strange at first
glance, containing two binaries, <code class="language-plaintext highlighter-rouge">mpv.exe</code> (large) and <code class="language-plaintext highlighter-rouge">mpv.com</code> (tiny).
Is that COM as in <a href="/blog/2014/12/09/">an old-school 16-bit DOS binary</a>? No, that’s just
a trick that works around a Windows limitation.</p>

<p>The Windows technology is broken up into subsystems. Console programs run
in the Console subsystem. Graphical programs run in the Windows subsystem.
<a href="/blog/2017/11/30/">The original WSL</a> was a subsystem. Unfortunately this design means
that a program must statically pick a subsystem, hardcoded into the binary
image. The program cannot select a subsystem dynamically. For example,
this is why Java installations have both <code class="language-plaintext highlighter-rouge">java.exe</code> and <code class="language-plaintext highlighter-rouge">javaw.exe</code>, and
Emacs has <code class="language-plaintext highlighter-rouge">emacs.exe</code> and <code class="language-plaintext highlighter-rouge">runemacs.exe</code>. Different binaries for different
subsystems.</p>

<p>On Linux, a program that wants to do graphics just talks to the Xorg
server or Wayland compositor. It can dynamically choose to be a terminal
application or a graphical application. Or even both at once. This is
exactly the behavior of <code class="language-plaintext highlighter-rouge">mpv</code>, and it faces a dilemma on Windows: With
subsystems, how can it be both?</p>

<p>The trick is based on the environment variable <code class="language-plaintext highlighter-rouge">PATHEXT</code> which tells
Windows how to prioritize executables with the same base name but
different file extensions. If I type <code class="language-plaintext highlighter-rouge">mpv</code> and it finds both <code class="language-plaintext highlighter-rouge">mpv.exe</code> and
<code class="language-plaintext highlighter-rouge">mpv.com</code>, which binary will run? It will be the first listed in
<code class="language-plaintext highlighter-rouge">PATHEXT</code>, and by default that starts with:</p>

<div class="language-plaintext highlighter-rouge"><div class="highlight"><pre class="highlight"><code>PATHEXT=.COM;.EXE;.BAT;...
</code></pre></div></div>

<p>So it will run <code class="language-plaintext highlighter-rouge">mpv.com</code>, which is actually a plain old <a href="https://wiki.osdev.org/PE">PE+</a> <code class="language-plaintext highlighter-rouge">.exe</code>
in disguise. The Windows subsystem <code class="language-plaintext highlighter-rouge">mpv.exe</code> gets the shortcut and file
associations while Console subsystem <code class="language-plaintext highlighter-rouge">mpv.com</code> catches command line
invocations and serves as console liaison as it invokes the real
<code class="language-plaintext highlighter-rouge">mpv.exe</code>. Ingenious!</p>

<p>I realized I can pull a similar trick to create command aliases — not the
<code class="language-plaintext highlighter-rouge">.com</code> trick, but the miniature flagger program. If only I could compile
each of those Batch files to tiny, well-behaved <code class="language-plaintext highlighter-rouge">.exe</code> files so that it
wouldn’t rely on the badly-behaved <code class="language-plaintext highlighter-rouge">cmd.exe</code>…</p>

<h4 id="tiny-c-programs">Tiny C programs</h4>

<p>Years ago <a href="/blog/2016/01/31/">I wrote about tiny, freestanding Windows executables</a>.
That research paid off here since that’s exactly what I want. The alias
command program need only manipulate its command line, invoke another
program, then wait for it to finish. This doesn’t require the C library,
just a handful of <code class="language-plaintext highlighter-rouge">kernel32.dll</code> calls. My alias command programs can be
so small that would no longer matter that I have 150 of them, and I get
complete control over their behavior.</p>

<p>To compile, I use <code class="language-plaintext highlighter-rouge">-nostdlib</code> and <code class="language-plaintext highlighter-rouge">-ffreestanding</code> to disable all system
libraries, <code class="language-plaintext highlighter-rouge">-lkernel32</code> to pull that one back in, <code class="language-plaintext highlighter-rouge">-Os</code> (optimize for
size), and <code class="language-plaintext highlighter-rouge">-s</code> (strip) all to make the result as small as possible.</p>

<p>I don’t want to write a little program for each alias command. Instead
I’ll use a couple of C defines, <code class="language-plaintext highlighter-rouge">EXE</code> and <code class="language-plaintext highlighter-rouge">CMD</code>, to inject the target
command at compile time. So this Batch file:</p>

<div class="language-bat highlighter-rouge"><div class="highlight"><pre class="highlight"><code>@target <span class="kd">arg1</span> <span class="kd">arg2</span> <span class="err">%</span><span class="o">*</span>
</code></pre></div></div>

<p>Is equivalent to this alias compilation:</p>

<div class="language-sh highlighter-rouge"><div class="highlight"><pre class="highlight"><code>gcc <span class="nt">-DEXE</span><span class="o">=</span><span class="s2">"target.exe"</span> <span class="nt">-DCMD</span><span class="o">=</span><span class="s2">"target arg1 arg2"</span> <span class="se">\</span>
    <span class="nt">-s</span> <span class="nt">-Os</span> <span class="nt">-nostdlib</span> <span class="nt">-ffreestanding</span> <span class="nt">-o</span> alias.exe alias.c <span class="nt">-lkernel32</span>
</code></pre></div></div>

<p>The <code class="language-plaintext highlighter-rouge">EXE</code> string is the actual <em>module</em> name, so the <code class="language-plaintext highlighter-rouge">.exe</code> extension is
required. The <code class="language-plaintext highlighter-rouge">CMD</code> string replaces the first complete token of the
command line string (think <code class="language-plaintext highlighter-rouge">argv[0]</code>) and may contain arbitrary additional
arguments (e.g. <code class="language-plaintext highlighter-rouge">-std=c99</code>). Both are handled as wide strings (<code class="language-plaintext highlighter-rouge">L"..."</code>)
since the alias program uses the wide Win32 API in order to be fully
transparent. Though unfortunately at this time it makes no difference: All
currently aliased programs use the “ANSI” API since the underlying C and
C++ standard libraries only use the ANSI API. (As far as I know, nobody
has ever written fully-functional C and C++ standard libraries for
Windows, not even Microsoft.)</p>

<p>You might wonder why the heck I’m gluing strings together for the
arguments. These will need to be parsed (word split, etc.) by someone
else, so shouldn’t I construct an argv array instead? That’s not how it
works on Windows: Programs receive a flat command string and are expected
to parse it themselves following <a href="https://docs.microsoft.com/en-us/previous-versions/17w5ykft(v=vs.85)">the format specification</a>. When
you write a C program, the C runtime does this for you to provide the
usual argv array.</p>

<p>This is upside down. The caller creating the process already has arguments
split into an argv array — or something like it — but Win32 requires the
caller to encode the argv array as a string following a special format so
that the recipient can immediately decode it. Why marshaling rather than
pass structured data in the first place? Why does Win32 only supply a
decoder (<a href="https://docs.microsoft.com/en-us/windows/win32/api/shellapi/nf-shellapi-commandlinetoargvw"><code class="language-plaintext highlighter-rouge">CommandLineToArgv</code></a>) and not an encoder (e.g. the missing
<code class="language-plaintext highlighter-rouge">ArgvToCommandLine</code>)? Hey, I don’t make the rules; I just have to live
with them.</p>

<p>You can look at the original source for the details, but the summary is
that I supply my own <code class="language-plaintext highlighter-rouge">xstrlen()</code>, <code class="language-plaintext highlighter-rouge">xmemcpy()</code>, and partial Win32 command
line parser — just enough to identify the first token, even if that token
is quoted. It glues the strings together, calls <code class="language-plaintext highlighter-rouge">CreateProcessW</code>, waits
for it to exit (<code class="language-plaintext highlighter-rouge">WaitForSingleObject</code>), retrieves the exit code
(<code class="language-plaintext highlighter-rouge">GetExitCodeProcess</code>), and exits with the same status. (The stuff that
comes for free with <code class="language-plaintext highlighter-rouge">exec(3)</code>.)</p>

<p>This all compiles to a 4kB executable, mostly padding, which is small
enough for my purposes. These compress to an acceptable 1kB each in the
.zip file. Smaller would be nicer, but this would require at minimum a
custom linker script, and even smaller would require hand-crafted
assembly.</p>

<p>This lingering issue solved, w64devkit now works better than ever. The
<code class="language-plaintext highlighter-rouge">alias.c</code> source is included in the kit in case you need to make any of
your own well-behaved alias commands.</p>

]]>
    </content>
  </entry>


  <entry>
    <title>Brute Force Incognito Browsing</title>
    <link rel="alternate" type="text/html" href="https://nullprogram.com/blog/2018/09/06/"/>
    <id>urn:uuid:376eff98-5b58-30fd-d101-3dac9052bf82</id>
    <updated>2018-09-06T14:07:13Z</updated>
    <category term="linux"/><category term="debian"/><category term="trick"/><category term="web"/>
    <content type="html">
      <![CDATA[<p>Both Firefox and Chrome have a feature for creating temporary private
browsing sessions. Firefox calls it <a href="https://support.mozilla.org/en-US/kb/private-browsing-use-firefox-without-history">Private Browsing</a> and Chrome
calls it <a href="https://support.google.com/chrome/answer/95464">Incognito Mode</a>. Both work essentially the same way. A
temporary browsing session is started without carrying over most
existing session state (cookies, etc.), and no state (cookies,
browsing history, cached data, etc.) is preserved after ending the
session. Depending on the configuration, some browser extensions will
be enabled in the private session, and their own internal state may be
preserved.</p>

<p>The most obvious use is for visiting websites that you don’t want
listed in your browsing history. Another use for more savvy users is
to visit websites with a fresh, empty cookie file. For example, some
news websites use a cookie to track the number visits and require a
subscription after a certain number of “free” articles. Manually
deleting cookies is a pain (especially without a specialized
extension), but opening the same article in a private session is two
clicks away.</p>

<p>For web development there’s yet another use. A private session is a way
to view your website from the perspective of a first-time visitor.
You’ll be logged out and will have little or no existing state.</p>

<p>However, sometimes <em>it just doesn’t go far enough</em>. Some of those news
websites have adapted, and in addition to counting the number of visits,
they’ve figured out how to detect private sessions and block them. I
haven’t looked into <em>how</em> they do this — maybe something to do with
local storage, or detecting previously cached content. Sometimes I want
a private session that’s <em>truly</em> fully isolated. The existing private
session features just aren’t isolated enough or they behave differently,
which is how they’re being detected.</p>

<p>Some time ago I put together a couple of scripts to brute force my own
private sessions when I need them, generally for testing websites in a
guaranteed fresh, fully-functioning instance. It also lets me run
multiple such sessions in parallel. My scripts don’t rely on any
private session feature of the browser, so the behavior is identical
to a real browser, making it undetectable.</p>

<p>The downside is that, for better or worse, no browser extensions are
carried over. In some ways this can be considered a feature, but a lot
of the time I would like my ad-blocker to carry over. Your ad-blocker is
probably <em>the</em> most important security software on your computer, so you
should hesitate to give it up.</p>

<p>Another downside is that both Firefox and Chrome have some irritating
first-time behaviors that can’t be disabled. The intent is to be
newbie-friendly but it just gets in my way. For example, both bug me
about logging into their browser platforms. Firefox starts with two
tabs. Chrome creates a popup to ask me to configure a printer. Both
start with a junk URL in the location bar so I can’t just middle-click
paste (i.e. the X11 selection clipboard) into it. It’s definitely not
designed for my use case.</p>

<h3 id="firefox">Firefox</h3>

<p>Here’s my brute force private session script for Firefox:</p>

<div class="language-sh highlighter-rouge"><div class="highlight"><pre class="highlight"><code><span class="c">#!/bin/sh -e</span>
<span class="nv">DIR</span><span class="o">=</span><span class="s2">"</span><span class="k">${</span><span class="nv">XDG_CACHE_HOME</span><span class="k">:-</span><span class="nv">$HOME</span><span class="p">/.cache</span><span class="k">}</span><span class="s2">"</span>
<span class="nb">mkdir</span> <span class="nt">-p</span> <span class="nt">--</span> <span class="s2">"</span><span class="nv">$DIR</span><span class="s2">"</span>
<span class="nv">TEMP</span><span class="o">=</span><span class="s2">"</span><span class="si">$(</span><span class="nb">mktemp</span> <span class="nt">-d</span> <span class="nt">--</span> <span class="s2">"</span><span class="nv">$DIR</span><span class="s2">/firefox-XXXXXX"</span><span class="si">)</span><span class="s2">"</span>
<span class="nb">trap</span> <span class="s2">"rm -rf -- '</span><span class="nv">$TEMP</span><span class="s2">'"</span> INT TERM EXIT
firefox <span class="nt">-profile</span> <span class="s2">"</span><span class="nv">$TEMP</span><span class="s2">"</span> <span class="nt">-no-remote</span> <span class="s2">"</span><span class="nv">$@</span><span class="s2">"</span>
</code></pre></div></div>

<p>It creates a temporary directory under <code class="language-plaintext highlighter-rouge">$XDG_CACHE_HOME</code> and tells
Firefox to use the profile in that directory. No such profile exists,
of course, so Firefox creates a fresh profile.</p>

<p>In theory I could just create a <em>new</em> profile alongside the default
within my existing <code class="language-plaintext highlighter-rouge">~/.mozilla</code> directory. However, I’ve never liked
Firefox’s profile feature, especially with the intentionally
unpredictable way it stores the profile itself: behind random path. I
also don’t trust it to be fully isolated and to fully clean up when I’m
done.</p>

<p>Before starting Firefox, I register a trap with the shell to clean up
the profile directory regardless of what happens. It doesn’t matter if
Firefox exits cleanly, if it crashes, or if I CTRL-C it to death.</p>

<p>The <code class="language-plaintext highlighter-rouge">-no-remote</code> option prevents the new Firefox instance from joining
onto an existing Firefox instance, which it <em>really</em> prefers to do even
though it’s technically supposed to be a different profile.</p>

<p>Note the <code class="language-plaintext highlighter-rouge">"$@"</code>, which passes arguments through to Firefox — most often
the URL of the site I want to test.</p>

<h3 id="chromium">Chromium</h3>

<p>I don’t actually use Chrome but rather the open source version,
Chromium. I think this script will also work with Chrome.</p>

<div class="language-sh highlighter-rouge"><div class="highlight"><pre class="highlight"><code><span class="c">#!/bin/sh -e</span>
<span class="nv">DIR</span><span class="o">=</span><span class="s2">"</span><span class="k">${</span><span class="nv">XDG_CACHE_HOME</span><span class="k">:-</span><span class="nv">$HOME</span><span class="p">/.cache</span><span class="k">}</span><span class="s2">"</span>
<span class="nb">mkdir</span> <span class="nt">-p</span> <span class="nt">--</span> <span class="s2">"</span><span class="nv">$DIR</span><span class="s2">"</span>
<span class="nv">TEMP</span><span class="o">=</span><span class="s2">"</span><span class="si">$(</span><span class="nb">mktemp</span> <span class="nt">-d</span> <span class="nt">--</span> <span class="s2">"</span><span class="nv">$DIR</span><span class="s2">/chromium-XXXXXX"</span><span class="si">)</span><span class="s2">"</span>
<span class="nb">trap</span> <span class="s2">"rm -rf -- '</span><span class="nv">$TEMP</span><span class="s2">'"</span> INT TERM EXIT
chromium <span class="nt">--user-data-dir</span><span class="o">=</span><span class="s2">"</span><span class="nv">$TEMP</span><span class="s2">"</span> <span class="se">\</span>
         <span class="nt">--no-default-browser-check</span> <span class="se">\</span>
         <span class="nt">--no-first-run</span> <span class="se">\</span>
         <span class="s2">"</span><span class="nv">$@</span><span class="s2">"</span> <span class="o">&gt;</span>/dev/null 2&gt;&amp;1
</code></pre></div></div>

<p>It’s exactly the same as the Firefox script and only the browser
arguments have changed. I tell it not to ask about being the default
browser, and <code class="language-plaintext highlighter-rouge">--no-first-run</code> disables <em>some</em> of the irritating
first-time behaviors.</p>

<p>Chromium is <em>very</em> noisy on the command line, so I also redirect all
output to <code class="language-plaintext highlighter-rouge">/dev/null</code>.</p>

<p>If you’re on Debian like me, its version of Chromium comes with a
<code class="language-plaintext highlighter-rouge">--temp-profile</code> option that handles the throwaway profile
automatically. So the script can be simplified:</p>

<div class="language-sh highlighter-rouge"><div class="highlight"><pre class="highlight"><code><span class="c">#!/bin/sh -e</span>
chromium <span class="nt">--temp-profile</span> <span class="se">\</span>
         <span class="nt">--no-default-browser-check</span> <span class="se">\</span>
         <span class="nt">--no-first-run</span> <span class="se">\</span>
         <span class="s2">"</span><span class="nv">$@</span><span class="s2">"</span> <span class="o">&gt;</span>/dev/null 2&gt;&amp;1
</code></pre></div></div>

<p>In my own use case, these scripts have fully replaced the built-in
private session features. In fact, since Chromium is not my primary
browser, my brute force private session script is how I usually launch
it. I only run it to test things, and I always want to test using a
fresh profile.</p>

]]>
    </content>
  </entry>


  <entry>
    <title>Render Multimedia in Pure C</title>
    <link rel="alternate" type="text/html" href="https://nullprogram.com/blog/2017/11/03/"/>
    <id>urn:uuid:4b36dd78-e85d-3637-8cd5-e44a2d3e683a</id>
    <updated>2017-11-03T22:31:15Z</updated>
    <category term="c"/><category term="media"/><category term="trick"/><category term="tutorial"/>
    <content type="html">
      <![CDATA[<p><em>Update 2020</em>: I’ve produced <a href="/blog/2020/06/29/">many more examples</a> over the years
(<a href="https://github.com/skeeto/scratch/tree/master/animation">even more</a>).</p>

<p>In a previous article <a href="/blog/2017/07/02/">I demonstrated video filtering with C and a
unix pipeline</a>. Thanks to the ubiquitous support for the
ridiculously simple <a href="https://en.wikipedia.org/wiki/Netpbm_format">Netpbm formats</a> — specifically the “Portable
PixMap” (<code class="language-plaintext highlighter-rouge">.ppm</code>, <code class="language-plaintext highlighter-rouge">P6</code>) binary format — it’s trivial to parse and
produce image data in any language without image libraries. Video
decoders and encoders at the ends of the pipeline do the heavy lifting
of processing the complicated video formats actually used to store and
transmit video.</p>

<p>Naturally this same technique can be used to <em>produce</em> new video in a
simple program. All that’s needed are a few functions to render
artifacts — lines, shapes, etc. — to an RGB buffer. With a bit of
basic sound synthesis, the same concept can be applied to create audio
in a separate audio stream — in this case using the simple (but not as
simple as Netpbm) WAV format. Put them together and a small,
standalone program can create multimedia.</p>

<p>Here’s the demonstration video I’ll be going through in this article.
It animates and visualizes various in-place sorting algorithms (<a href="/blog/2016/09/05/">see
also</a>). The elements are rendered as colored dots, ordered by
hue, with red at 12 o’clock. A dot’s distance from the center is
proportional to its corresponding element’s distance from its correct
position. Each dot emits a sinusoidal tone with a unique frequency
when it swaps places in a particular frame.</p>

<p><a href="/video/?v=sort-circle"><img src="/img/sort-circle/video.png" alt="" /></a></p>

<p>
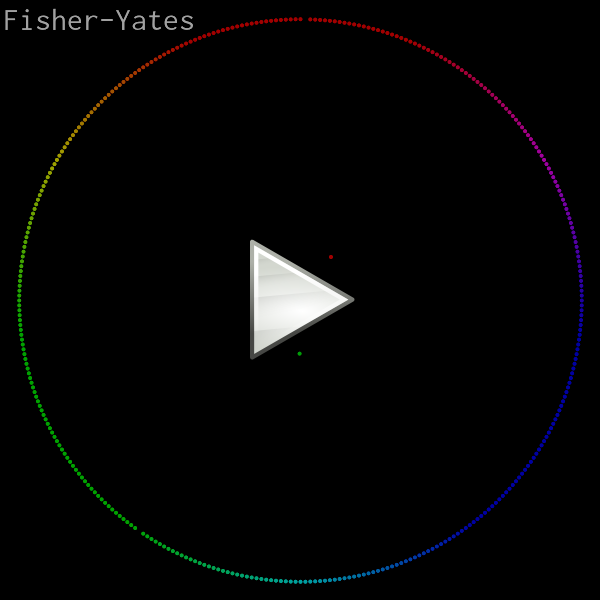
Original credit for this visualization concept goes to <a href="https://www.youtube.com/watch?v=sYd_-pAfbBw">w0rthy</a>.</p>

<p>All of the source code (less than 600 lines of C), ready to run, can be
found here:</p>

<ul>
  <li><strong><a href="https://github.com/skeeto/sort-circle">https://github.com/skeeto/sort-circle</a></strong></li>
</ul>

<p>On any modern computer, rendering is real-time, even at 60 FPS, so you
may be able to pipe the program’s output directly into your media player
of choice. (If not, consider getting a better media player!)</p>

<div class="language-plaintext highlighter-rouge"><div class="highlight"><pre class="highlight"><code>$ ./sort | mpv --no-correct-pts --fps=60 -
</code></pre></div></div>

<p>VLC requires some help from <a href="http://mjpeg.sourceforge.net/">ppmtoy4m</a>:</p>

<div class="language-plaintext highlighter-rouge"><div class="highlight"><pre class="highlight"><code>$ ./sort | ppmtoy4m -F60:1 | vlc -
</code></pre></div></div>

<p>Or you can just encode it to another format. Recent versions of
libavformat can input PPM images directly, which means <code class="language-plaintext highlighter-rouge">x264</code> can read
the program’s output directly:</p>

<div class="language-plaintext highlighter-rouge"><div class="highlight"><pre class="highlight"><code>$ ./sort | x264 --fps 60 -o video.mp4 /dev/stdin
</code></pre></div></div>

<p>By default there is no audio output. I wish there was a nice way to
embed audio with the video stream, but this requires a container and
that would destroy all the simplicity of this project. So instead, the
<code class="language-plaintext highlighter-rouge">-a</code> option captures the audio in a separate file. Use <code class="language-plaintext highlighter-rouge">ffmpeg</code> to
combine the audio and video into a single media file:</p>

<div class="language-plaintext highlighter-rouge"><div class="highlight"><pre class="highlight"><code>$ ./sort -a audio.wav | x264 --fps 60 -o video.mp4 /dev/stdin
$ ffmpeg -i video.mp4 -i audio.wav -vcodec copy -acodec mp3 \
         combined.mp4
</code></pre></div></div>

<p>You might think you’ll be clever by using <code class="language-plaintext highlighter-rouge">mkfifo</code> (i.e. a named pipe)
to pipe both audio and video into ffmpeg at the same time. This will
only result in a deadlock since neither program is prepared for this.
One will be blocked writing one stream while the other is blocked
reading on the other stream.</p>

<p>Several years ago <a href="/blog/2016/09/02/">my intern and I</a> used the exact same pure C
rendering technique to produce these raytracer videos:</p>

<p>
<video width="600" controls="controls">
  <source type="video/webm" src="https://skeeto.s3.amazonaws.com/netray/bigdemo_full.webm" />
</video>
</p>

<p>
<video width="600" controls="controls">
  <source type="video/webm" src="https://skeeto.s3.amazonaws.com/netray/bounce720.webm" />
</video>
</p>

<p>I also used this technique to <a href="/blog/2017/09/07/">illustrate gap buffers</a>.</p>

<h3 id="pixel-format-and-rendering">Pixel format and rendering</h3>

<p>This program really only has one purpose: rendering a sorting video
with a fixed, square resolution. So rather than write generic image
rendering functions, some assumptions will be hard coded. For example,
the video size will just be hard coded and assumed square, making it
simpler and faster. I chose 800x800 as the default:</p>

<div class="language-c highlighter-rouge"><div class="highlight"><pre class="highlight"><code><span class="cp">#define S     800
</span></code></pre></div></div>

<p>Rather than define some sort of color struct with red, green, and blue
fields, color will be represented by a 24-bit integer (<code class="language-plaintext highlighter-rouge">long</code>). I
arbitrarily chose red to be the most significant 8 bits. This has
nothing to do with the order of the individual channels in Netpbm
since these integers are never dumped out. (This would have stupid
byte-order issues anyway.) “Color literals” are particularly
convenient and familiar in this format. For example, the constant for
pink: <code class="language-plaintext highlighter-rouge">0xff7f7fUL</code>.</p>

<p>In practice the color channels will be operated upon separately, so
here are a couple of helper functions to convert the channels between
this format and normalized floats (0.0–1.0).</p>

<div class="language-c highlighter-rouge"><div class="highlight"><pre class="highlight"><code><span class="k">static</span> <span class="kt">void</span>
<span class="nf">rgb_split</span><span class="p">(</span><span class="kt">unsigned</span> <span class="kt">long</span> <span class="n">c</span><span class="p">,</span> <span class="kt">float</span> <span class="o">*</span><span class="n">r</span><span class="p">,</span> <span class="kt">float</span> <span class="o">*</span><span class="n">g</span><span class="p">,</span> <span class="kt">float</span> <span class="o">*</span><span class="n">b</span><span class="p">)</span>
<span class="p">{</span>
    <span class="o">*</span><span class="n">r</span> <span class="o">=</span> <span class="p">((</span><span class="n">c</span> <span class="o">&gt;&gt;</span> <span class="mi">16</span><span class="p">)</span> <span class="o">/</span> <span class="mi">255</span><span class="p">.</span><span class="mi">0</span><span class="n">f</span><span class="p">);</span>
    <span class="o">*</span><span class="n">g</span> <span class="o">=</span> <span class="p">(((</span><span class="n">c</span> <span class="o">&gt;&gt;</span> <span class="mi">8</span><span class="p">)</span> <span class="o">&amp;</span> <span class="mh">0xff</span><span class="p">)</span> <span class="o">/</span> <span class="mi">255</span><span class="p">.</span><span class="mi">0</span><span class="n">f</span><span class="p">);</span>
    <span class="o">*</span><span class="n">b</span> <span class="o">=</span> <span class="p">((</span><span class="n">c</span> <span class="o">&amp;</span> <span class="mh">0xff</span><span class="p">)</span> <span class="o">/</span> <span class="mi">255</span><span class="p">.</span><span class="mi">0</span><span class="n">f</span><span class="p">);</span>
<span class="p">}</span>

<span class="k">static</span> <span class="kt">unsigned</span> <span class="kt">long</span>
<span class="nf">rgb_join</span><span class="p">(</span><span class="kt">float</span> <span class="n">r</span><span class="p">,</span> <span class="kt">float</span> <span class="n">g</span><span class="p">,</span> <span class="kt">float</span> <span class="n">b</span><span class="p">)</span>
<span class="p">{</span>
    <span class="kt">unsigned</span> <span class="kt">long</span> <span class="n">ir</span> <span class="o">=</span> <span class="n">roundf</span><span class="p">(</span><span class="n">r</span> <span class="o">*</span> <span class="mi">255</span><span class="p">.</span><span class="mi">0</span><span class="n">f</span><span class="p">);</span>
    <span class="kt">unsigned</span> <span class="kt">long</span> <span class="n">ig</span> <span class="o">=</span> <span class="n">roundf</span><span class="p">(</span><span class="n">g</span> <span class="o">*</span> <span class="mi">255</span><span class="p">.</span><span class="mi">0</span><span class="n">f</span><span class="p">);</span>
    <span class="kt">unsigned</span> <span class="kt">long</span> <span class="n">ib</span> <span class="o">=</span> <span class="n">roundf</span><span class="p">(</span><span class="n">b</span> <span class="o">*</span> <span class="mi">255</span><span class="p">.</span><span class="mi">0</span><span class="n">f</span><span class="p">);</span>
    <span class="k">return</span> <span class="p">(</span><span class="n">ir</span> <span class="o">&lt;&lt;</span> <span class="mi">16</span><span class="p">)</span> <span class="o">|</span> <span class="p">(</span><span class="n">ig</span> <span class="o">&lt;&lt;</span> <span class="mi">8</span><span class="p">)</span> <span class="o">|</span> <span class="n">ib</span><span class="p">;</span>
<span class="p">}</span>
</code></pre></div></div>

<p>Originally I decided the integer form would be sRGB, and these
functions handled the conversion to and from sRGB. Since it had no
noticeable effect on the output video, I discarded it. In more
sophisticated rendering you may want to take this into account.</p>

<p>The RGB buffer where images are rendered is just a plain old byte
buffer with the same pixel format as PPM. The <code class="language-plaintext highlighter-rouge">ppm_set()</code> function
writes a color to a particular pixel in the buffer, assumed to be <code class="language-plaintext highlighter-rouge">S</code>
by <code class="language-plaintext highlighter-rouge">S</code> pixels. The complement to this function is <code class="language-plaintext highlighter-rouge">ppm_get()</code>, which
will be needed for blending.</p>

<div class="language-c highlighter-rouge"><div class="highlight"><pre class="highlight"><code><span class="k">static</span> <span class="kt">void</span>
<span class="nf">ppm_set</span><span class="p">(</span><span class="kt">unsigned</span> <span class="kt">char</span> <span class="o">*</span><span class="n">buf</span><span class="p">,</span> <span class="kt">int</span> <span class="n">x</span><span class="p">,</span> <span class="kt">int</span> <span class="n">y</span><span class="p">,</span> <span class="kt">unsigned</span> <span class="kt">long</span> <span class="n">color</span><span class="p">)</span>
<span class="p">{</span>
    <span class="n">buf</span><span class="p">[</span><span class="n">y</span> <span class="o">*</span> <span class="n">S</span> <span class="o">*</span> <span class="mi">3</span> <span class="o">+</span> <span class="n">x</span> <span class="o">*</span> <span class="mi">3</span> <span class="o">+</span> <span class="mi">0</span><span class="p">]</span> <span class="o">=</span> <span class="n">color</span> <span class="o">&gt;&gt;</span> <span class="mi">16</span><span class="p">;</span>
    <span class="n">buf</span><span class="p">[</span><span class="n">y</span> <span class="o">*</span> <span class="n">S</span> <span class="o">*</span> <span class="mi">3</span> <span class="o">+</span> <span class="n">x</span> <span class="o">*</span> <span class="mi">3</span> <span class="o">+</span> <span class="mi">1</span><span class="p">]</span> <span class="o">=</span> <span class="n">color</span> <span class="o">&gt;&gt;</span>  <span class="mi">8</span><span class="p">;</span>
    <span class="n">buf</span><span class="p">[</span><span class="n">y</span> <span class="o">*</span> <span class="n">S</span> <span class="o">*</span> <span class="mi">3</span> <span class="o">+</span> <span class="n">x</span> <span class="o">*</span> <span class="mi">3</span> <span class="o">+</span> <span class="mi">2</span><span class="p">]</span> <span class="o">=</span> <span class="n">color</span> <span class="o">&gt;&gt;</span>  <span class="mi">0</span><span class="p">;</span>
<span class="p">}</span>

<span class="k">static</span> <span class="kt">unsigned</span> <span class="kt">long</span>
<span class="nf">ppm_get</span><span class="p">(</span><span class="kt">unsigned</span> <span class="kt">char</span> <span class="o">*</span><span class="n">buf</span><span class="p">,</span> <span class="kt">int</span> <span class="n">x</span><span class="p">,</span> <span class="kt">int</span> <span class="n">y</span><span class="p">)</span>
<span class="p">{</span>
    <span class="kt">unsigned</span> <span class="kt">long</span> <span class="n">r</span> <span class="o">=</span> <span class="n">buf</span><span class="p">[</span><span class="n">y</span> <span class="o">*</span> <span class="n">S</span> <span class="o">*</span> <span class="mi">3</span> <span class="o">+</span> <span class="n">x</span> <span class="o">*</span> <span class="mi">3</span> <span class="o">+</span> <span class="mi">0</span><span class="p">];</span>
    <span class="kt">unsigned</span> <span class="kt">long</span> <span class="n">g</span> <span class="o">=</span> <span class="n">buf</span><span class="p">[</span><span class="n">y</span> <span class="o">*</span> <span class="n">S</span> <span class="o">*</span> <span class="mi">3</span> <span class="o">+</span> <span class="n">x</span> <span class="o">*</span> <span class="mi">3</span> <span class="o">+</span> <span class="mi">1</span><span class="p">];</span>
    <span class="kt">unsigned</span> <span class="kt">long</span> <span class="n">b</span> <span class="o">=</span> <span class="n">buf</span><span class="p">[</span><span class="n">y</span> <span class="o">*</span> <span class="n">S</span> <span class="o">*</span> <span class="mi">3</span> <span class="o">+</span> <span class="n">x</span> <span class="o">*</span> <span class="mi">3</span> <span class="o">+</span> <span class="mi">2</span><span class="p">];</span>
    <span class="k">return</span> <span class="p">(</span><span class="n">r</span> <span class="o">&lt;&lt;</span> <span class="mi">16</span><span class="p">)</span> <span class="o">|</span> <span class="p">(</span><span class="n">g</span> <span class="o">&lt;&lt;</span> <span class="mi">8</span><span class="p">)</span> <span class="o">|</span> <span class="n">b</span><span class="p">;</span>
<span class="p">}</span>
</code></pre></div></div>

<p>Since the buffer is already in the right format, writing an image is
dead simple. I like to flush after each frame so that observers
generally see clean, complete frames. It helps in debugging.</p>

<div class="language-c highlighter-rouge"><div class="highlight"><pre class="highlight"><code><span class="k">static</span> <span class="kt">void</span>
<span class="nf">ppm_write</span><span class="p">(</span><span class="k">const</span> <span class="kt">unsigned</span> <span class="kt">char</span> <span class="o">*</span><span class="n">buf</span><span class="p">,</span> <span class="kt">FILE</span> <span class="o">*</span><span class="n">f</span><span class="p">)</span>
<span class="p">{</span>
    <span class="n">fprintf</span><span class="p">(</span><span class="n">f</span><span class="p">,</span> <span class="s">"P6</span><span class="se">\n</span><span class="s">%d %d</span><span class="se">\n</span><span class="s">255</span><span class="se">\n</span><span class="s">"</span><span class="p">,</span> <span class="n">S</span><span class="p">,</span> <span class="n">S</span><span class="p">);</span>
    <span class="n">fwrite</span><span class="p">(</span><span class="n">buf</span><span class="p">,</span> <span class="n">S</span> <span class="o">*</span> <span class="mi">3</span><span class="p">,</span> <span class="n">S</span><span class="p">,</span> <span class="n">f</span><span class="p">);</span>
    <span class="n">fflush</span><span class="p">(</span><span class="n">f</span><span class="p">);</span>
<span class="p">}</span>
</code></pre></div></div>

<h3 id="dot-rendering">Dot rendering</h3>

<p>If you zoom into one of those dots, you may notice it has a nice
smooth edge. Here’s one rendered at 30x the normal resolution. I did
not render, then scale this image in another piece of software. This
is straight out of the C program.</p>

<p><img src="/img/sort-circle/dot.png" alt="" /></p>

<p>In an early version of this program I used a dumb dot rendering
routine. It took a color and a hard, integer pixel coordinate. All the
pixels within a certain distance of this coordinate were set to the
color, everything else was left alone. This had two bad effects:</p>

<ul>
  <li>
    <p>Dots <em>jittered</em> as they moved around since their positions were
rounded to the nearest pixel for rendering. A dot would be centered on
one pixel, then suddenly centered on another pixel. This looked bad
even when those pixels were adjacent.</p>
  </li>
  <li>
    <p>There’s no blending between dots when they overlap, making the lack of
anti-aliasing even more pronounced.</p>
  </li>
</ul>

<video src="/img/sort-circle/flyby.mp4" loop="loop" autoplay="autoplay" width="600">
</video>

<p>Instead the dot’s position is computed in floating point and is
actually rendered as if it were between pixels. This is done with a
shader-like routine that uses <a href="https://en.wikipedia.org/wiki/Smoothstep">smoothstep</a> — just as <a href="/tags/opengl/">found in
shader languages</a> — to give the dot a smooth edge. That edge
is blended into the image, whether that’s the background or a
previously-rendered dot. The input to the smoothstep is the distance
from the floating point coordinate to the center (or corner?) of the
pixel being rendered, maintaining that between-pixel smoothness.</p>

<p>Rather than dump the whole function here, let’s look at it piece by
piece. I have two new constants to define the inner dot radius and the
outer dot radius. It’s smooth between these radii.</p>

<div class="language-c highlighter-rouge"><div class="highlight"><pre class="highlight"><code><span class="cp">#define R0    (S / 400.0f)  // dot inner radius
#define R1    (S / 200.0f)  // dot outer radius
</span></code></pre></div></div>

<p>The dot-drawing function takes the image buffer, the dot’s coordinates,
and its foreground color.</p>

<div class="language-c highlighter-rouge"><div class="highlight"><pre class="highlight"><code><span class="k">static</span> <span class="kt">void</span>
<span class="nf">ppm_dot</span><span class="p">(</span><span class="kt">unsigned</span> <span class="kt">char</span> <span class="o">*</span><span class="n">buf</span><span class="p">,</span> <span class="kt">float</span> <span class="n">x</span><span class="p">,</span> <span class="kt">float</span> <span class="n">y</span><span class="p">,</span> <span class="kt">unsigned</span> <span class="kt">long</span> <span class="n">fgc</span><span class="p">);</span>
</code></pre></div></div>

<p>The first thing to do is extract the color components.</p>

<div class="language-c highlighter-rouge"><div class="highlight"><pre class="highlight"><code>    <span class="kt">float</span> <span class="n">fr</span><span class="p">,</span> <span class="n">fg</span><span class="p">,</span> <span class="n">fb</span><span class="p">;</span>
    <span class="n">rgb_split</span><span class="p">(</span><span class="n">fgc</span><span class="p">,</span> <span class="o">&amp;</span><span class="n">fr</span><span class="p">,</span> <span class="o">&amp;</span><span class="n">fg</span><span class="p">,</span> <span class="o">&amp;</span><span class="n">fb</span><span class="p">);</span>
</code></pre></div></div>

<p>Next determine the range of pixels over which the dot will be draw.
These are based on the two radii and will be used for looping.</p>

<div class="language-c highlighter-rouge"><div class="highlight"><pre class="highlight"><code>    <span class="kt">int</span> <span class="n">miny</span> <span class="o">=</span> <span class="n">floorf</span><span class="p">(</span><span class="n">y</span> <span class="o">-</span> <span class="n">R1</span> <span class="o">-</span> <span class="mi">1</span><span class="p">);</span>
    <span class="kt">int</span> <span class="n">maxy</span> <span class="o">=</span> <span class="n">ceilf</span><span class="p">(</span><span class="n">y</span> <span class="o">+</span> <span class="n">R1</span> <span class="o">+</span> <span class="mi">1</span><span class="p">);</span>
    <span class="kt">int</span> <span class="n">minx</span> <span class="o">=</span> <span class="n">floorf</span><span class="p">(</span><span class="n">x</span> <span class="o">-</span> <span class="n">R1</span> <span class="o">-</span> <span class="mi">1</span><span class="p">);</span>
    <span class="kt">int</span> <span class="n">maxx</span> <span class="o">=</span> <span class="n">ceilf</span><span class="p">(</span><span class="n">x</span> <span class="o">+</span> <span class="n">R1</span> <span class="o">+</span> <span class="mi">1</span><span class="p">);</span>
</code></pre></div></div>

<p>Here’s the loop structure. Everything else will be inside the innermost
loop. The <code class="language-plaintext highlighter-rouge">dx</code> and <code class="language-plaintext highlighter-rouge">dy</code> are the floating point distances from the center
of the dot.</p>

<div class="language-c highlighter-rouge"><div class="highlight"><pre class="highlight"><code>    <span class="k">for</span> <span class="p">(</span><span class="kt">int</span> <span class="n">py</span> <span class="o">=</span> <span class="n">miny</span><span class="p">;</span> <span class="n">py</span> <span class="o">&lt;=</span> <span class="n">maxy</span><span class="p">;</span> <span class="n">py</span><span class="o">++</span><span class="p">)</span> <span class="p">{</span>
        <span class="kt">float</span> <span class="n">dy</span> <span class="o">=</span> <span class="n">py</span> <span class="o">-</span> <span class="n">y</span><span class="p">;</span>
        <span class="k">for</span> <span class="p">(</span><span class="kt">int</span> <span class="n">px</span> <span class="o">=</span> <span class="n">minx</span><span class="p">;</span> <span class="n">px</span> <span class="o">&lt;=</span> <span class="n">maxx</span><span class="p">;</span> <span class="n">px</span><span class="o">++</span><span class="p">)</span> <span class="p">{</span>
            <span class="kt">float</span> <span class="n">dx</span> <span class="o">=</span> <span class="n">px</span> <span class="o">-</span> <span class="n">x</span><span class="p">;</span>
            <span class="cm">/* ... */</span>
        <span class="p">}</span>
    <span class="p">}</span>
</code></pre></div></div>

<p>Use the x and y distances to compute the distance and smoothstep
value, which will be the alpha. Within the inner radius the color is
on 100%. Outside the outer radius it’s 0%. Elsewhere it’s something in
between.</p>

<div class="language-c highlighter-rouge"><div class="highlight"><pre class="highlight"><code>            <span class="kt">float</span> <span class="n">d</span> <span class="o">=</span> <span class="n">sqrtf</span><span class="p">(</span><span class="n">dy</span> <span class="o">*</span> <span class="n">dy</span> <span class="o">+</span> <span class="n">dx</span> <span class="o">*</span> <span class="n">dx</span><span class="p">);</span>
            <span class="kt">float</span> <span class="n">a</span> <span class="o">=</span> <span class="n">smoothstep</span><span class="p">(</span><span class="n">R1</span><span class="p">,</span> <span class="n">R0</span><span class="p">,</span> <span class="n">d</span><span class="p">);</span>
</code></pre></div></div>

<p>Get the background color, extract its components, and blend the
foreground and background according to the computed alpha value. Finally
write the pixel back into the buffer.</p>

<div class="language-c highlighter-rouge"><div class="highlight"><pre class="highlight"><code>            <span class="kt">unsigned</span> <span class="kt">long</span> <span class="n">bgc</span> <span class="o">=</span> <span class="n">ppm_get</span><span class="p">(</span><span class="n">buf</span><span class="p">,</span> <span class="n">px</span><span class="p">,</span> <span class="n">py</span><span class="p">);</span>
            <span class="kt">float</span> <span class="n">br</span><span class="p">,</span> <span class="n">bg</span><span class="p">,</span> <span class="n">bb</span><span class="p">;</span>
            <span class="n">rgb_split</span><span class="p">(</span><span class="n">bgc</span><span class="p">,</span> <span class="o">&amp;</span><span class="n">br</span><span class="p">,</span> <span class="o">&amp;</span><span class="n">bg</span><span class="p">,</span> <span class="o">&amp;</span><span class="n">bb</span><span class="p">);</span>

            <span class="kt">float</span> <span class="n">r</span> <span class="o">=</span> <span class="n">a</span> <span class="o">*</span> <span class="n">fr</span> <span class="o">+</span> <span class="p">(</span><span class="mi">1</span> <span class="o">-</span> <span class="n">a</span><span class="p">)</span> <span class="o">*</span> <span class="n">br</span><span class="p">;</span>
            <span class="kt">float</span> <span class="n">g</span> <span class="o">=</span> <span class="n">a</span> <span class="o">*</span> <span class="n">fg</span> <span class="o">+</span> <span class="p">(</span><span class="mi">1</span> <span class="o">-</span> <span class="n">a</span><span class="p">)</span> <span class="o">*</span> <span class="n">bg</span><span class="p">;</span>
            <span class="kt">float</span> <span class="n">b</span> <span class="o">=</span> <span class="n">a</span> <span class="o">*</span> <span class="n">fb</span> <span class="o">+</span> <span class="p">(</span><span class="mi">1</span> <span class="o">-</span> <span class="n">a</span><span class="p">)</span> <span class="o">*</span> <span class="n">bb</span><span class="p">;</span>
            <span class="n">ppm_set</span><span class="p">(</span><span class="n">buf</span><span class="p">,</span> <span class="n">px</span><span class="p">,</span> <span class="n">py</span><span class="p">,</span> <span class="n">rgb_join</span><span class="p">(</span><span class="n">r</span><span class="p">,</span> <span class="n">g</span><span class="p">,</span> <span class="n">b</span><span class="p">));</span>
</code></pre></div></div>

<p>That’s all it takes to render a smooth dot anywhere in the image.</p>

<h3 id="rendering-the-array">Rendering the array</h3>

<p>The array being sorted is just a global variable. This simplifies some
of the sorting functions since a few are implemented recursively. They
can call for a frame to be rendered without needing to pass the full
array. With the dot-drawing routine done, rendering a frame is easy:</p>

<div class="language-c highlighter-rouge"><div class="highlight"><pre class="highlight"><code><span class="cp">#define N     360           // number of dots
</span>
<span class="k">static</span> <span class="kt">int</span> <span class="n">array</span><span class="p">[</span><span class="n">N</span><span class="p">];</span>

<span class="k">static</span> <span class="kt">void</span>
<span class="nf">frame</span><span class="p">(</span><span class="kt">void</span><span class="p">)</span>
<span class="p">{</span>
    <span class="k">static</span> <span class="kt">unsigned</span> <span class="kt">char</span> <span class="n">buf</span><span class="p">[</span><span class="n">S</span> <span class="o">*</span> <span class="n">S</span> <span class="o">*</span> <span class="mi">3</span><span class="p">];</span>
    <span class="n">memset</span><span class="p">(</span><span class="n">buf</span><span class="p">,</span> <span class="mi">0</span><span class="p">,</span> <span class="k">sizeof</span><span class="p">(</span><span class="n">buf</span><span class="p">));</span>
    <span class="k">for</span> <span class="p">(</span><span class="kt">int</span> <span class="n">i</span> <span class="o">=</span> <span class="mi">0</span><span class="p">;</span> <span class="n">i</span> <span class="o">&lt;</span> <span class="n">N</span><span class="p">;</span> <span class="n">i</span><span class="o">++</span><span class="p">)</span> <span class="p">{</span>
        <span class="kt">float</span> <span class="n">delta</span> <span class="o">=</span> <span class="n">abs</span><span class="p">(</span><span class="n">i</span> <span class="o">-</span> <span class="n">array</span><span class="p">[</span><span class="n">i</span><span class="p">])</span> <span class="o">/</span> <span class="p">(</span><span class="n">N</span> <span class="o">/</span> <span class="mi">2</span><span class="p">.</span><span class="mi">0</span><span class="n">f</span><span class="p">);</span>
        <span class="kt">float</span> <span class="n">x</span> <span class="o">=</span> <span class="o">-</span><span class="n">sinf</span><span class="p">(</span><span class="n">i</span> <span class="o">*</span> <span class="mi">2</span><span class="p">.</span><span class="mi">0</span><span class="n">f</span> <span class="o">*</span> <span class="n">PI</span> <span class="o">/</span> <span class="n">N</span><span class="p">);</span>
        <span class="kt">float</span> <span class="n">y</span> <span class="o">=</span> <span class="o">-</span><span class="n">cosf</span><span class="p">(</span><span class="n">i</span> <span class="o">*</span> <span class="mi">2</span><span class="p">.</span><span class="mi">0</span><span class="n">f</span> <span class="o">*</span> <span class="n">PI</span> <span class="o">/</span> <span class="n">N</span><span class="p">);</span>
        <span class="kt">float</span> <span class="n">r</span> <span class="o">=</span> <span class="n">S</span> <span class="o">*</span> <span class="mi">15</span><span class="p">.</span><span class="mi">0</span><span class="n">f</span> <span class="o">/</span> <span class="mi">32</span><span class="p">.</span><span class="mi">0</span><span class="n">f</span> <span class="o">*</span> <span class="p">(</span><span class="mi">1</span><span class="p">.</span><span class="mi">0</span><span class="n">f</span> <span class="o">-</span> <span class="n">delta</span><span class="p">);</span>
        <span class="kt">float</span> <span class="n">px</span> <span class="o">=</span> <span class="n">r</span> <span class="o">*</span> <span class="n">x</span> <span class="o">+</span> <span class="n">S</span> <span class="o">/</span> <span class="mi">2</span><span class="p">.</span><span class="mi">0</span><span class="n">f</span><span class="p">;</span>
        <span class="kt">float</span> <span class="n">py</span> <span class="o">=</span> <span class="n">r</span> <span class="o">*</span> <span class="n">y</span> <span class="o">+</span> <span class="n">S</span> <span class="o">/</span> <span class="mi">2</span><span class="p">.</span><span class="mi">0</span><span class="n">f</span><span class="p">;</span>
        <span class="n">ppm_dot</span><span class="p">(</span><span class="n">buf</span><span class="p">,</span> <span class="n">px</span><span class="p">,</span> <span class="n">py</span><span class="p">,</span> <span class="n">hue</span><span class="p">(</span><span class="n">array</span><span class="p">[</span><span class="n">i</span><span class="p">]));</span>
    <span class="p">}</span>
    <span class="n">ppm_write</span><span class="p">(</span><span class="n">buf</span><span class="p">,</span> <span class="n">stdout</span><span class="p">);</span>
<span class="p">}</span>
</code></pre></div></div>

<p>The buffer is <code class="language-plaintext highlighter-rouge">static</code> since it will be rather large, especially if <code class="language-plaintext highlighter-rouge">S</code>
is cranked up. Otherwise it’s likely to overflow the stack. The
<code class="language-plaintext highlighter-rouge">memset()</code> fills it with black. If you wanted a different background
color, here’s where you change it.</p>

<p>For each element, compute its delta from the proper array position,
which becomes its distance from the center of the image. The angle is
based on its actual position. The <code class="language-plaintext highlighter-rouge">hue()</code> function (not shown in this
article) returns the color for the given element.</p>

<p>With the <code class="language-plaintext highlighter-rouge">frame()</code> function complete, all I need is a sorting function
that calls <code class="language-plaintext highlighter-rouge">frame()</code> at appropriate times. Here are a couple of
examples:</p>

<div class="language-c highlighter-rouge"><div class="highlight"><pre class="highlight"><code><span class="k">static</span> <span class="kt">void</span>
<span class="nf">shuffle</span><span class="p">(</span><span class="kt">int</span> <span class="n">array</span><span class="p">[</span><span class="n">N</span><span class="p">],</span> <span class="kt">uint64_t</span> <span class="o">*</span><span class="n">rng</span><span class="p">)</span>
<span class="p">{</span>
    <span class="k">for</span> <span class="p">(</span><span class="kt">int</span> <span class="n">i</span> <span class="o">=</span> <span class="n">N</span> <span class="o">-</span> <span class="mi">1</span><span class="p">;</span> <span class="n">i</span> <span class="o">&gt;</span> <span class="mi">0</span><span class="p">;</span> <span class="n">i</span><span class="o">--</span><span class="p">)</span> <span class="p">{</span>
        <span class="kt">uint32_t</span> <span class="n">r</span> <span class="o">=</span> <span class="n">pcg32</span><span class="p">(</span><span class="n">rng</span><span class="p">)</span> <span class="o">%</span> <span class="p">(</span><span class="n">i</span> <span class="o">+</span> <span class="mi">1</span><span class="p">);</span>
        <span class="n">swap</span><span class="p">(</span><span class="n">array</span><span class="p">,</span> <span class="n">i</span><span class="p">,</span> <span class="n">r</span><span class="p">);</span>
        <span class="n">frame</span><span class="p">();</span>
    <span class="p">}</span>
<span class="p">}</span>

<span class="k">static</span> <span class="kt">void</span>
<span class="nf">sort_bubble</span><span class="p">(</span><span class="kt">int</span> <span class="n">array</span><span class="p">[</span><span class="n">N</span><span class="p">])</span>
<span class="p">{</span>
    <span class="kt">int</span> <span class="n">c</span><span class="p">;</span>
    <span class="k">do</span> <span class="p">{</span>
        <span class="n">c</span> <span class="o">=</span> <span class="mi">0</span><span class="p">;</span>
        <span class="k">for</span> <span class="p">(</span><span class="kt">int</span> <span class="n">i</span> <span class="o">=</span> <span class="mi">1</span><span class="p">;</span> <span class="n">i</span> <span class="o">&lt;</span> <span class="n">N</span><span class="p">;</span> <span class="n">i</span><span class="o">++</span><span class="p">)</span> <span class="p">{</span>
            <span class="k">if</span> <span class="p">(</span><span class="n">array</span><span class="p">[</span><span class="n">i</span> <span class="o">-</span> <span class="mi">1</span><span class="p">]</span> <span class="o">&gt;</span> <span class="n">array</span><span class="p">[</span><span class="n">i</span><span class="p">])</span> <span class="p">{</span>
                <span class="n">swap</span><span class="p">(</span><span class="n">array</span><span class="p">,</span> <span class="n">i</span> <span class="o">-</span> <span class="mi">1</span><span class="p">,</span> <span class="n">i</span><span class="p">);</span>
                <span class="n">c</span> <span class="o">=</span> <span class="mi">1</span><span class="p">;</span>
            <span class="p">}</span>
        <span class="p">}</span>
        <span class="n">frame</span><span class="p">();</span>
    <span class="p">}</span> <span class="k">while</span> <span class="p">(</span><span class="n">c</span><span class="p">);</span>
<span class="p">}</span>
</code></pre></div></div>

<h3 id="synthesizing-audio">Synthesizing audio</h3>

<p>To add audio I need to keep track of which elements were swapped in
this frame. When producing a frame I need to generate and mix tones
for each element that was swapped.</p>

<p>Notice the <code class="language-plaintext highlighter-rouge">swap()</code> function above? That’s not just for convenience.
That’s also how things are tracked for the audio.</p>

<div class="language-c highlighter-rouge"><div class="highlight"><pre class="highlight"><code><span class="k">static</span> <span class="kt">int</span> <span class="n">swaps</span><span class="p">[</span><span class="n">N</span><span class="p">];</span>

<span class="k">static</span> <span class="kt">void</span>
<span class="nf">swap</span><span class="p">(</span><span class="kt">int</span> <span class="n">a</span><span class="p">[</span><span class="n">N</span><span class="p">],</span> <span class="kt">int</span> <span class="n">i</span><span class="p">,</span> <span class="kt">int</span> <span class="n">j</span><span class="p">)</span>
<span class="p">{</span>
    <span class="kt">int</span> <span class="n">tmp</span> <span class="o">=</span> <span class="n">a</span><span class="p">[</span><span class="n">i</span><span class="p">];</span>
    <span class="n">a</span><span class="p">[</span><span class="n">i</span><span class="p">]</span> <span class="o">=</span> <span class="n">a</span><span class="p">[</span><span class="n">j</span><span class="p">];</span>
    <span class="n">a</span><span class="p">[</span><span class="n">j</span><span class="p">]</span> <span class="o">=</span> <span class="n">tmp</span><span class="p">;</span>
    <span class="n">swaps</span><span class="p">[(</span><span class="n">a</span> <span class="o">-</span> <span class="n">array</span><span class="p">)</span> <span class="o">+</span> <span class="n">i</span><span class="p">]</span><span class="o">++</span><span class="p">;</span>
    <span class="n">swaps</span><span class="p">[(</span><span class="n">a</span> <span class="o">-</span> <span class="n">array</span><span class="p">)</span> <span class="o">+</span> <span class="n">j</span><span class="p">]</span><span class="o">++</span><span class="p">;</span>
<span class="p">}</span>
</code></pre></div></div>

<p>Before we get ahead of ourselves I need to write a <a href="http://soundfile.sapp.org/doc/WaveFormat/">WAV header</a>.
Without getting into the purpose of each field, just note that the
header has 13 fields, followed immediately by 16-bit little endian PCM
samples. There will be only one channel (monotone).</p>

<div class="language-c highlighter-rouge"><div class="highlight"><pre class="highlight"><code><span class="cp">#define HZ    44100         // audio sample rate
</span>
<span class="k">static</span> <span class="kt">void</span>
<span class="nf">wav_init</span><span class="p">(</span><span class="kt">FILE</span> <span class="o">*</span><span class="n">f</span><span class="p">)</span>
<span class="p">{</span>
    <span class="n">emit_u32be</span><span class="p">(</span><span class="mh">0x52494646UL</span><span class="p">,</span> <span class="n">f</span><span class="p">);</span> <span class="c1">// "RIFF"</span>
    <span class="n">emit_u32le</span><span class="p">(</span><span class="mh">0xffffffffUL</span><span class="p">,</span> <span class="n">f</span><span class="p">);</span> <span class="c1">// file length</span>
    <span class="n">emit_u32be</span><span class="p">(</span><span class="mh">0x57415645UL</span><span class="p">,</span> <span class="n">f</span><span class="p">);</span> <span class="c1">// "WAVE"</span>
    <span class="n">emit_u32be</span><span class="p">(</span><span class="mh">0x666d7420UL</span><span class="p">,</span> <span class="n">f</span><span class="p">);</span> <span class="c1">// "fmt "</span>
    <span class="n">emit_u32le</span><span class="p">(</span><span class="mi">16</span><span class="p">,</span>           <span class="n">f</span><span class="p">);</span> <span class="c1">// struct size</span>
    <span class="n">emit_u16le</span><span class="p">(</span><span class="mi">1</span><span class="p">,</span>            <span class="n">f</span><span class="p">);</span> <span class="c1">// PCM</span>
    <span class="n">emit_u16le</span><span class="p">(</span><span class="mi">1</span><span class="p">,</span>            <span class="n">f</span><span class="p">);</span> <span class="c1">// mono</span>
    <span class="n">emit_u32le</span><span class="p">(</span><span class="n">HZ</span><span class="p">,</span>           <span class="n">f</span><span class="p">);</span> <span class="c1">// sample rate (i.e. 44.1 kHz)</span>
    <span class="n">emit_u32le</span><span class="p">(</span><span class="n">HZ</span> <span class="o">*</span> <span class="mi">2</span><span class="p">,</span>       <span class="n">f</span><span class="p">);</span> <span class="c1">// byte rate</span>
    <span class="n">emit_u16le</span><span class="p">(</span><span class="mi">2</span><span class="p">,</span>            <span class="n">f</span><span class="p">);</span> <span class="c1">// block size</span>
    <span class="n">emit_u16le</span><span class="p">(</span><span class="mi">16</span><span class="p">,</span>           <span class="n">f</span><span class="p">);</span> <span class="c1">// bits per sample</span>
    <span class="n">emit_u32be</span><span class="p">(</span><span class="mh">0x64617461UL</span><span class="p">,</span> <span class="n">f</span><span class="p">);</span> <span class="c1">// "data"</span>
    <span class="n">emit_u32le</span><span class="p">(</span><span class="mh">0xffffffffUL</span><span class="p">,</span> <span class="n">f</span><span class="p">);</span> <span class="c1">// byte length</span>
<span class="p">}</span>
</code></pre></div></div>

<p>Rather than tackle the annoying problem of figuring out the total
length of the audio ahead of time, I just wave my hands and write the
maximum possible number of bytes (<code class="language-plaintext highlighter-rouge">0xffffffff</code>). Most software that
can read WAV files will understand this to mean the entire rest of the
file contains samples.</p>

<p>With the header out of the way all I have to do is write 1/60th of a
second worth of samples to this file each time a frame is produced.
That’s 735 samples (1,470 bytes) at 44.1kHz.</p>

<p>The simplest place to do audio synthesis is in <code class="language-plaintext highlighter-rouge">frame()</code> right after
rendering the image.</p>

<div class="language-c highlighter-rouge"><div class="highlight"><pre class="highlight"><code><span class="cp">#define FPS   60            // output framerate
#define MINHZ 20            // lowest tone
#define MAXHZ 1000          // highest tone
</span>
<span class="k">static</span> <span class="kt">void</span>
<span class="nf">frame</span><span class="p">(</span><span class="kt">void</span><span class="p">)</span>
<span class="p">{</span>
    <span class="cm">/* ... rendering ... */</span>

    <span class="cm">/* ... synthesis ... */</span>
<span class="p">}</span>
</code></pre></div></div>

<p>With the largest tone frequency at 1kHz, <a href="https://en.wikipedia.org/wiki/Nyquist_frequency">Nyquist</a> says we only
need to sample at 2kHz. 8kHz is a very common sample rate and gives
some overhead space, making it a good choice. However, I found that
audio encoding software was a lot happier to accept the standard CD
sample rate of 44.1kHz, so I stuck with that.</p>

<p>The first thing to do is to allocate and zero a buffer for this
frame’s samples.</p>

<div class="language-c highlighter-rouge"><div class="highlight"><pre class="highlight"><code>    <span class="kt">int</span> <span class="n">nsamples</span> <span class="o">=</span> <span class="n">HZ</span> <span class="o">/</span> <span class="n">FPS</span><span class="p">;</span>
    <span class="k">static</span> <span class="kt">float</span> <span class="n">samples</span><span class="p">[</span><span class="n">HZ</span> <span class="o">/</span> <span class="n">FPS</span><span class="p">];</span>
    <span class="n">memset</span><span class="p">(</span><span class="n">samples</span><span class="p">,</span> <span class="mi">0</span><span class="p">,</span> <span class="k">sizeof</span><span class="p">(</span><span class="n">samples</span><span class="p">));</span>
</code></pre></div></div>

<p>Next determine how many “voices” there are in this frame. This is used
to mix the samples by averaging them. If an element was swapped more
than once this frame, it’s a little louder than the others — i.e. it’s
played twice at the same time, in phase.</p>

<div class="language-c highlighter-rouge"><div class="highlight"><pre class="highlight"><code>    <span class="kt">int</span> <span class="n">voices</span> <span class="o">=</span> <span class="mi">0</span><span class="p">;</span>
    <span class="k">for</span> <span class="p">(</span><span class="kt">int</span> <span class="n">i</span> <span class="o">=</span> <span class="mi">0</span><span class="p">;</span> <span class="n">i</span> <span class="o">&lt;</span> <span class="n">N</span><span class="p">;</span> <span class="n">i</span><span class="o">++</span><span class="p">)</span>
        <span class="n">voices</span> <span class="o">+=</span> <span class="n">swaps</span><span class="p">[</span><span class="n">i</span><span class="p">];</span>
</code></pre></div></div>

<p>Here’s the most complicated part. I use <code class="language-plaintext highlighter-rouge">sinf()</code> to produce the
sinusoidal wave based on the element’s frequency. I also use a parabola
as an <em>envelope</em> to shape the beginning and ending of this tone so that
it fades in and fades out. Otherwise you get the nasty, high-frequency
“pop” sound as the wave is given a hard cut off.</p>

<p><img src="/img/sort-circle/envelope.svg" alt="" /></p>

<div class="language-c highlighter-rouge"><div class="highlight"><pre class="highlight"><code>    <span class="k">for</span> <span class="p">(</span><span class="kt">int</span> <span class="n">i</span> <span class="o">=</span> <span class="mi">0</span><span class="p">;</span> <span class="n">i</span> <span class="o">&lt;</span> <span class="n">N</span><span class="p">;</span> <span class="n">i</span><span class="o">++</span><span class="p">)</span> <span class="p">{</span>
        <span class="k">if</span> <span class="p">(</span><span class="n">swaps</span><span class="p">[</span><span class="n">i</span><span class="p">])</span> <span class="p">{</span>
            <span class="kt">float</span> <span class="n">hz</span> <span class="o">=</span> <span class="n">i</span> <span class="o">*</span> <span class="p">(</span><span class="n">MAXHZ</span> <span class="o">-</span> <span class="n">MINHZ</span><span class="p">)</span> <span class="o">/</span> <span class="p">(</span><span class="kt">float</span><span class="p">)</span><span class="n">N</span> <span class="o">+</span> <span class="n">MINHZ</span><span class="p">;</span>
            <span class="k">for</span> <span class="p">(</span><span class="kt">int</span> <span class="n">j</span> <span class="o">=</span> <span class="mi">0</span><span class="p">;</span> <span class="n">j</span> <span class="o">&lt;</span> <span class="n">nsamples</span><span class="p">;</span> <span class="n">j</span><span class="o">++</span><span class="p">)</span> <span class="p">{</span>
                <span class="kt">float</span> <span class="n">u</span> <span class="o">=</span> <span class="mi">1</span><span class="p">.</span><span class="mi">0</span><span class="n">f</span> <span class="o">-</span> <span class="n">j</span> <span class="o">/</span> <span class="p">(</span><span class="kt">float</span><span class="p">)(</span><span class="n">nsamples</span> <span class="o">-</span> <span class="mi">1</span><span class="p">);</span>
                <span class="kt">float</span> <span class="n">parabola</span> <span class="o">=</span> <span class="mi">1</span><span class="p">.</span><span class="mi">0</span><span class="n">f</span> <span class="o">-</span> <span class="p">(</span><span class="n">u</span> <span class="o">*</span> <span class="mi">2</span> <span class="o">-</span> <span class="mi">1</span><span class="p">)</span> <span class="o">*</span> <span class="p">(</span><span class="n">u</span> <span class="o">*</span> <span class="mi">2</span> <span class="o">-</span> <span class="mi">1</span><span class="p">);</span>
                <span class="kt">float</span> <span class="n">envelope</span> <span class="o">=</span> <span class="n">parabola</span> <span class="o">*</span> <span class="n">parabola</span> <span class="o">*</span> <span class="n">parabola</span><span class="p">;</span>
                <span class="kt">float</span> <span class="n">v</span> <span class="o">=</span> <span class="n">sinf</span><span class="p">(</span><span class="n">j</span> <span class="o">*</span> <span class="mi">2</span><span class="p">.</span><span class="mi">0</span><span class="n">f</span> <span class="o">*</span> <span class="n">PI</span> <span class="o">/</span> <span class="n">HZ</span> <span class="o">*</span> <span class="n">hz</span><span class="p">)</span> <span class="o">*</span> <span class="n">envelope</span><span class="p">;</span>
                <span class="n">samples</span><span class="p">[</span><span class="n">j</span><span class="p">]</span> <span class="o">+=</span> <span class="n">swaps</span><span class="p">[</span><span class="n">i</span><span class="p">]</span> <span class="o">*</span> <span class="n">v</span> <span class="o">/</span> <span class="n">voices</span><span class="p">;</span>
            <span class="p">}</span>
        <span class="p">}</span>
    <span class="p">}</span>
</code></pre></div></div>

<p>Finally I write out each sample as a signed 16-bit value. I flush the
frame audio just like I flushed the frame image, keeping them somewhat
in sync from an outsider’s perspective.</p>

<div class="language-c highlighter-rouge"><div class="highlight"><pre class="highlight"><code>    <span class="k">for</span> <span class="p">(</span><span class="kt">int</span> <span class="n">i</span> <span class="o">=</span> <span class="mi">0</span><span class="p">;</span> <span class="n">i</span> <span class="o">&lt;</span> <span class="n">nsamples</span><span class="p">;</span> <span class="n">i</span><span class="o">++</span><span class="p">)</span> <span class="p">{</span>
        <span class="kt">int</span> <span class="n">s</span> <span class="o">=</span> <span class="n">samples</span><span class="p">[</span><span class="n">i</span><span class="p">]</span> <span class="o">*</span> <span class="mh">0x7fff</span><span class="p">;</span>
        <span class="n">emit_u16le</span><span class="p">(</span><span class="n">s</span><span class="p">,</span> <span class="n">wav</span><span class="p">);</span>
    <span class="p">}</span>
    <span class="n">fflush</span><span class="p">(</span><span class="n">wav</span><span class="p">);</span>
</code></pre></div></div>

<p>Before returning, reset the swap counter for the next frame.</p>

<div class="language-c highlighter-rouge"><div class="highlight"><pre class="highlight"><code>    <span class="n">memset</span><span class="p">(</span><span class="n">swaps</span><span class="p">,</span> <span class="mi">0</span><span class="p">,</span> <span class="k">sizeof</span><span class="p">(</span><span class="n">swaps</span><span class="p">));</span>
</code></pre></div></div>

<h3 id="font-rendering">Font rendering</h3>

<p>You may have noticed there was text rendered in the corner of the video
announcing the sort function. There’s font bitmap data in <code class="language-plaintext highlighter-rouge">font.h</code> which
gets sampled to render that text. It’s not terribly complicated, but
you’ll have to study the code on your own to see how that works.</p>

<h3 id="learning-more">Learning more</h3>

<p>This simple video rendering technique has served me well for some
years now. All it takes is a bit of knowledge about rendering. I
learned quite a bit just from watching <a href="https://www.youtube.com/user/handmadeheroarchive">Handmade Hero</a>, where
Casey writes a software renderer from scratch, then implements a
nearly identical renderer with OpenGL. The more I learn about
rendering, the better this technique works.</p>

<p>Before writing this post I spent some time experimenting with using a
media player as a interface to a game. For example, rather than render
the game using OpenGL or similar, render it as PPM frames and send it
to the media player to be displayed, just as game consoles drive
television sets. Unfortunately the latency is <em>horrible</em> — multiple
seconds — so that idea just doesn’t work. So while this technique is
fast enough for real time rendering, it’s no good for interaction.</p>

]]>
    </content>
  </entry>


  <entry>
    <title>Rolling Shutter Simulation in C</title>
    <link rel="alternate" type="text/html" href="https://nullprogram.com/blog/2017/07/02/"/>
    <id>urn:uuid:</id>
    <updated>2017-07-02T18:35:16Z</updated>
    <category term="c"/><category term="media"/><category term="tutorial"/><category term="trick"/>
    <content type="html">
      <![CDATA[<p>The most recent <a href="https://www.youtube.com/watch?v=dNVtMmLlnoE">Smarter Every Day (#172)</a> explains a phenomenon
that results from <em>rolling shutter</em>. You’ve likely seen this effect in
some of your own digital photographs. When a CMOS digital camera
captures a picture, it reads one row of the sensor at a time. If the
subject of the picture is a fast-moving object (relative to the
camera), then the subject will change significantly while the image is
being captured, giving strange, unreal results:</p>

<p><a href="/img/rolling-shutter/rolling-shutter.jpg"><img src="/img/rolling-shutter/rolling-shutter-thumb.jpg" alt="" /></a></p>

<p>In the <em>Smarter Every Day</em> video, Destin illustrates the effect by
simulating rolling shutter using a short video clip. In each frame of
the video, a few additional rows are locked in place, showing the
effect in slow motion, making it easier to understand.</p>

<video src="https://nullprogram.s3.amazonaws.com/rolling-shutter/rolling-shutter-5.mp4" width="500" height="500" loop="loop" controls="controls" autoplay="autoplay">
</video>

<p>At the end of the video he thanks a friend for figuring out how to get
After Effects to simulate rolling shutter. After thinking about this
for a moment, I figured I could easily accomplish this myself with
just a bit of C, without any libraries. The video above this paragraph
is the result.</p>

<p>I <a href="/blog/2011/11/28/">previously described a technique</a> to edit and manipulate
video without any formal video editing tools. A unix pipeline is
sufficient for doing minor video editing, especially without sound.
The program at the front of the pipe decodes the video into a raw,
uncompressed format, such as YUV4MPEG or <a href="https://en.wikipedia.org/wiki/Netpbm_format">PPM</a>. The tools in
the middle losslessly manipulate this data to achieve the desired
effect (watermark, scaling, etc.). Finally, the tool at the end
encodes the video into a standard format.</p>

<div class="language-plaintext highlighter-rouge"><div class="highlight"><pre class="highlight"><code>$ decode video.mp4 | xform-a | xform-b | encode out.mp4
</code></pre></div></div>

<p>For the “decode” program I’ll be using ffmpeg now that it’s <a href="https://lwn.net/Articles/650816/">back in
the Debian repositories</a>. You can throw a video in virtually any
format at it and it will write PPM frames to standard output. For the
encoder I’ll be using the <code class="language-plaintext highlighter-rouge">x264</code> command line program, though ffmpeg
could handle this part as well. Without any filters in the middle,
this example will just re-encode a video:</p>

<div class="language-plaintext highlighter-rouge"><div class="highlight"><pre class="highlight"><code>$ ffmpeg -i input.mp4 -f image2pipe -vcodec ppm pipe:1 | \
    x264 -o output.mp4 /dev/stdin
</code></pre></div></div>

<p>The filter tools in the middle only need to read and write in the raw
image format. They’re a little bit like shaders, and they’re easy to
write. In this case, I’ll write C program that simulates rolling
shutter. The filter could be written in any language that can read and
write binary data from standard input to standard output.</p>

<p><em>Update</em>: It appears that input PPM streams are a rather recent
feature of libavformat (a.k.a lavf, used by <code class="language-plaintext highlighter-rouge">x264</code>). Support for PPM
input first appeared in libavformat 3.1 (released June 26th, 2016). If
you’re using an older version of libavformat, you’ll need to stick
<code class="language-plaintext highlighter-rouge">ppmtoy4m</code> in front of <code class="language-plaintext highlighter-rouge">x264</code> in the processing pipeline.</p>

<div class="language-plaintext highlighter-rouge"><div class="highlight"><pre class="highlight"><code>$ ffmpeg -i input.mp4 -f image2pipe -vcodec ppm pipe:1 | \
    ppmtoy4m | \
    x264 -o output.mp4 /dev/stdin
</code></pre></div></div>

<h3 id="video-filtering-in-c">Video filtering in C</h3>

<p>In the past, my go to for raw video data has been loose PPM frames and
YUV4MPEG streams (via <code class="language-plaintext highlighter-rouge">ppmtoy4m</code>). Fortunately, over the years a lot
of tools have gained the ability to manipulate streams of PPM images,
which is a much more convenient format. Despite being raw video data,
YUV4MPEG is still a fairly complex format with lots of options and
annoying colorspace concerns. <a href="http://netpbm.sourceforge.net/doc/ppm.html">PPM is simple RGB</a> without
complications. The header is just text:</p>

<div class="language-plaintext highlighter-rouge"><div class="highlight"><pre class="highlight"><code>P6
&lt;width&gt; &lt;height&gt;
&lt;maxdepth&gt;
&lt;width * height * 3 binary RGB data&gt;
</code></pre></div></div>

<p>The maximum depth is virtually always 255. A smaller value reduces the
image’s dynamic range without reducing the size. A larger value involves
byte-order issues (endian). For video frame data, the file will
typically look like:</p>

<div class="language-plaintext highlighter-rouge"><div class="highlight"><pre class="highlight"><code>P6
1920 1080
255
&lt;frame RGB&gt;
</code></pre></div></div>

<p>Unfortunately the format is actually a little more flexible than this.
Except for the new line (LF, 0x0A) after the maximum depth, the
whitespace is arbitrary and comments starting with <code class="language-plaintext highlighter-rouge">#</code> are permitted.
Since the tools I’m using won’t produce comments, I’m going to ignore
that detail. I’ll also assume the maximum depth is always 255.</p>

<p>Here’s the structure I used to represent a PPM image, just one frame
of video. I’m using a <em>flexible array member</em> to pack the data at the
end of the structure.</p>

<div class="language-c highlighter-rouge"><div class="highlight"><pre class="highlight"><code><span class="k">struct</span> <span class="n">frame</span> <span class="p">{</span>
    <span class="kt">size_t</span> <span class="n">width</span><span class="p">;</span>
    <span class="kt">size_t</span> <span class="n">height</span><span class="p">;</span>
    <span class="kt">unsigned</span> <span class="kt">char</span> <span class="n">data</span><span class="p">[];</span>
<span class="p">};</span>
</code></pre></div></div>

<p>Next a function to allocate a frame:</p>

<div class="language-c highlighter-rouge"><div class="highlight"><pre class="highlight"><code><span class="k">static</span> <span class="k">struct</span> <span class="n">frame</span> <span class="o">*</span>
<span class="nf">frame_create</span><span class="p">(</span><span class="kt">size_t</span> <span class="n">width</span><span class="p">,</span> <span class="kt">size_t</span> <span class="n">height</span><span class="p">)</span>
<span class="p">{</span>
    <span class="k">struct</span> <span class="n">frame</span> <span class="o">*</span><span class="n">f</span> <span class="o">=</span> <span class="n">malloc</span><span class="p">(</span><span class="k">sizeof</span><span class="p">(</span><span class="o">*</span><span class="n">f</span><span class="p">)</span> <span class="o">+</span> <span class="n">width</span> <span class="o">*</span> <span class="n">height</span> <span class="o">*</span> <span class="mi">3</span><span class="p">);</span>
    <span class="n">f</span><span class="o">-&gt;</span><span class="n">width</span> <span class="o">=</span> <span class="n">width</span><span class="p">;</span>
    <span class="n">f</span><span class="o">-&gt;</span><span class="n">height</span> <span class="o">=</span> <span class="n">height</span><span class="p">;</span>
    <span class="k">return</span> <span class="n">f</span><span class="p">;</span>
<span class="p">}</span>
</code></pre></div></div>

<p>We’ll need a way to write the frames we’ve created.</p>

<div class="language-c highlighter-rouge"><div class="highlight"><pre class="highlight"><code><span class="k">static</span> <span class="kt">void</span>
<span class="nf">frame_write</span><span class="p">(</span><span class="k">struct</span> <span class="n">frame</span> <span class="o">*</span><span class="n">f</span><span class="p">)</span>
<span class="p">{</span>
    <span class="n">printf</span><span class="p">(</span><span class="s">"P6</span><span class="se">\n</span><span class="s">%zu %zu</span><span class="se">\n</span><span class="s">255</span><span class="se">\n</span><span class="s">"</span><span class="p">,</span> <span class="n">f</span><span class="o">-&gt;</span><span class="n">width</span><span class="p">,</span> <span class="n">f</span><span class="o">-&gt;</span><span class="n">height</span><span class="p">);</span>
    <span class="n">fwrite</span><span class="p">(</span><span class="n">f</span><span class="o">-&gt;</span><span class="n">data</span><span class="p">,</span> <span class="n">f</span><span class="o">-&gt;</span><span class="n">width</span> <span class="o">*</span> <span class="n">f</span><span class="o">-&gt;</span><span class="n">height</span><span class="p">,</span> <span class="mi">3</span><span class="p">,</span> <span class="n">stdout</span><span class="p">);</span>
<span class="p">}</span>
</code></pre></div></div>

<p>Finally, a function to read a frame, reusing an existing buffer if
possible. The most complex part of the whole program is just parsing
the PPM header. The <code class="language-plaintext highlighter-rouge">%*c</code> in the <code class="language-plaintext highlighter-rouge">scanf()</code> specifically consumes the
line feed immediately following the maximum depth.</p>

<div class="language-c highlighter-rouge"><div class="highlight"><pre class="highlight"><code><span class="k">static</span> <span class="k">struct</span> <span class="n">frame</span> <span class="o">*</span>
<span class="nf">frame_read</span><span class="p">(</span><span class="k">struct</span> <span class="n">frame</span> <span class="o">*</span><span class="n">f</span><span class="p">)</span>
<span class="p">{</span>
    <span class="kt">size_t</span> <span class="n">width</span><span class="p">,</span> <span class="n">height</span><span class="p">;</span>
    <span class="k">if</span> <span class="p">(</span><span class="n">scanf</span><span class="p">(</span><span class="s">"P6 %zu%zu%*d%*c"</span><span class="p">,</span> <span class="o">&amp;</span><span class="n">width</span><span class="p">,</span> <span class="o">&amp;</span><span class="n">height</span><span class="p">)</span> <span class="o">&lt;</span> <span class="mi">2</span><span class="p">)</span> <span class="p">{</span>
        <span class="n">free</span><span class="p">(</span><span class="n">f</span><span class="p">);</span>
        <span class="k">return</span> <span class="mi">0</span><span class="p">;</span>
    <span class="p">}</span>
    <span class="k">if</span> <span class="p">(</span><span class="o">!</span><span class="n">f</span> <span class="o">||</span> <span class="n">f</span><span class="o">-&gt;</span><span class="n">width</span> <span class="o">!=</span> <span class="n">width</span> <span class="o">||</span> <span class="n">f</span><span class="o">-&gt;</span><span class="n">height</span> <span class="o">!=</span> <span class="n">height</span><span class="p">)</span> <span class="p">{</span>
        <span class="n">free</span><span class="p">(</span><span class="n">f</span><span class="p">);</span>
        <span class="n">f</span> <span class="o">=</span> <span class="n">frame_create</span><span class="p">(</span><span class="n">width</span><span class="p">,</span> <span class="n">height</span><span class="p">);</span>
    <span class="p">}</span>
    <span class="n">fread</span><span class="p">(</span><span class="n">f</span><span class="o">-&gt;</span><span class="n">data</span><span class="p">,</span> <span class="n">width</span> <span class="o">*</span> <span class="n">height</span><span class="p">,</span> <span class="mi">3</span><span class="p">,</span> <span class="n">stdin</span><span class="p">);</span>
    <span class="k">return</span> <span class="n">f</span><span class="p">;</span>
<span class="p">}</span>
</code></pre></div></div>

<p>Since this program will only be part of a pipeline, I’m not worried
about checking the results of <code class="language-plaintext highlighter-rouge">fwrite()</code> and <code class="language-plaintext highlighter-rouge">fread()</code>. The process
will be killed by the shell if something goes wrong with the pipes.
However, if we’re out of video data and get an EOF, <code class="language-plaintext highlighter-rouge">scanf()</code> will
fail, indicating the EOF, which is normal and can be handled cleanly.</p>

<h4 id="an-identity-filter">An identity filter</h4>

<p>That’s all the infrastructure we need to built an identity filter that
passes frames through unchanged:</p>

<div class="language-c highlighter-rouge"><div class="highlight"><pre class="highlight"><code><span class="kt">int</span> <span class="nf">main</span><span class="p">(</span><span class="kt">void</span><span class="p">)</span>
<span class="p">{</span>
    <span class="k">struct</span> <span class="n">frame</span> <span class="o">*</span><span class="n">frame</span> <span class="o">=</span> <span class="mi">0</span><span class="p">;</span>
    <span class="k">while</span> <span class="p">((</span><span class="n">frame</span> <span class="o">=</span> <span class="n">frame_read</span><span class="p">(</span><span class="n">frame</span><span class="p">)))</span>
        <span class="n">frame_write</span><span class="p">(</span><span class="n">frame</span><span class="p">);</span>
<span class="p">}</span>
</code></pre></div></div>

<p>Processing a frame is just matter of adding some stuff to the body of
the <code class="language-plaintext highlighter-rouge">while</code> loop.</p>

<h4 id="a-rolling-shutter-filter">A rolling shutter filter</h4>

<p>For the rolling shutter filter, in addition to the input frame we need
an image to hold the result of the rolling shutter. Each input frame
will be copied into the rolling shutter frame, but a little less will be
copied from each frame, locking a little bit more of the image in place.</p>

<div class="language-c highlighter-rouge"><div class="highlight"><pre class="highlight"><code><span class="kt">int</span>
<span class="nf">main</span><span class="p">(</span><span class="kt">void</span><span class="p">)</span>
<span class="p">{</span>
    <span class="kt">int</span> <span class="n">shutter_step</span> <span class="o">=</span> <span class="mi">3</span><span class="p">;</span>
    <span class="kt">size_t</span> <span class="n">shutter</span> <span class="o">=</span> <span class="mi">0</span><span class="p">;</span>
    <span class="k">struct</span> <span class="n">frame</span> <span class="o">*</span><span class="n">f</span> <span class="o">=</span> <span class="n">frame_read</span><span class="p">(</span><span class="mi">0</span><span class="p">);</span>
    <span class="k">struct</span> <span class="n">frame</span> <span class="o">*</span><span class="n">out</span> <span class="o">=</span> <span class="n">frame_create</span><span class="p">(</span><span class="n">f</span><span class="o">-&gt;</span><span class="n">width</span><span class="p">,</span> <span class="n">f</span><span class="o">-&gt;</span><span class="n">height</span><span class="p">);</span>
    <span class="k">while</span> <span class="p">(</span><span class="n">shutter</span> <span class="o">&lt;</span> <span class="n">f</span><span class="o">-&gt;</span><span class="n">height</span> <span class="o">&amp;&amp;</span> <span class="p">(</span><span class="n">f</span> <span class="o">=</span> <span class="n">frame_read</span><span class="p">(</span><span class="n">f</span><span class="p">)))</span> <span class="p">{</span>
        <span class="kt">size_t</span> <span class="n">offset</span> <span class="o">=</span> <span class="n">shutter</span> <span class="o">*</span> <span class="n">f</span><span class="o">-&gt;</span><span class="n">width</span> <span class="o">*</span> <span class="mi">3</span><span class="p">;</span>
        <span class="kt">size_t</span> <span class="n">length</span> <span class="o">=</span> <span class="n">f</span><span class="o">-&gt;</span><span class="n">height</span> <span class="o">*</span> <span class="n">f</span><span class="o">-&gt;</span><span class="n">width</span> <span class="o">*</span> <span class="mi">3</span> <span class="o">-</span> <span class="n">offset</span><span class="p">;</span>
        <span class="n">memcpy</span><span class="p">(</span><span class="n">out</span><span class="o">-&gt;</span><span class="n">data</span> <span class="o">+</span> <span class="n">offset</span><span class="p">,</span> <span class="n">f</span><span class="o">-&gt;</span><span class="n">data</span> <span class="o">+</span> <span class="n">offset</span><span class="p">,</span> <span class="n">length</span><span class="p">);</span>
        <span class="n">frame_write</span><span class="p">(</span><span class="n">out</span><span class="p">);</span>
        <span class="n">shutter</span> <span class="o">+=</span> <span class="n">shutter_step</span><span class="p">;</span>
    <span class="p">}</span>
    <span class="n">free</span><span class="p">(</span><span class="n">out</span><span class="p">);</span>
    <span class="n">free</span><span class="p">(</span><span class="n">f</span><span class="p">);</span>
<span class="p">}</span>
</code></pre></div></div>

<p>The <code class="language-plaintext highlighter-rouge">shutter_step</code> controls how many rows are capture per frame of
video. Generally capturing one row per frame is too slow for the
simulation. For a 1080p video, that’s 1,080 frames for the entire
simulation: 18 seconds at 60 FPS or 36 seconds at 30 FPS. If this
program were to accept command line arguments, controlling the shutter
rate would be one of the options.</p>

<p>Putting it all together:</p>

<div class="language-plaintext highlighter-rouge"><div class="highlight"><pre class="highlight"><code>$ ffmpeg -i input.mp4 -f image2pipe -vcodec ppm pipe:1 | \
    ./rolling-shutter | \
    x264 -o output.mp4 /dev/stdin
</code></pre></div></div>

<p>Here are some of the results for different shutter rates: 1, 3, 5, 8,
10, and 15 rows per frame. Feel free to right-click and “View Video”
to see the full resolution video.</p>

<div class="grid">
<video src="https://nullprogram.s3.amazonaws.com/rolling-shutter/rolling-shutter-1.mp4" width="300" height="300" controls="controls">
</video>
<video src="https://nullprogram.s3.amazonaws.com/rolling-shutter/rolling-shutter-3.mp4" width="300" height="300" controls="controls">
</video>
<video src="https://nullprogram.s3.amazonaws.com/rolling-shutter/rolling-shutter-5.mp4" width="300" height="300" controls="controls">
</video>
<video src="https://nullprogram.s3.amazonaws.com/rolling-shutter/rolling-shutter-8.mp4" width="300" height="300" controls="controls">
</video>
<video src="https://nullprogram.s3.amazonaws.com/rolling-shutter/rolling-shutter-10.mp4" width="300" height="300" controls="controls">
</video>
<video src="https://nullprogram.s3.amazonaws.com/rolling-shutter/rolling-shutter-15.mp4" width="300" height="300" controls="controls">
</video>
</div>

<h3 id="source-and-original-input">Source and original input</h3>

<p>This post contains the full source in parts, but here it is all together:</p>

<ul>
  <li><a href="/download/rshutter.c" class="download">rshutter.c</a></li>
</ul>

<p>Here’s the original video, filmed by my wife using her Nikon D5500, in
case you want to try it for yourself:</p>

<video src="https://nullprogram.s3.amazonaws.com/rolling-shutter/original.mp4" width="300" height="300" controls="controls">
</video>

<p>It took much longer to figure out the string-pulling contraption to
slowly spin the fan at a constant rate than it took to write the C
filter program.</p>

<h3 id="followup-links">Followup Links</h3>

<p>On Hacker News, <a href="https://news.ycombinator.com/item?id=14684793">morecoffee shared a video of the second order
effect</a> (<a href="http://antidom.com/fan.webm">direct link</a>), where the rolling shutter
speed changes over time.</p>

<p>A deeper analysis of rolling shutter: <a href="http://danielwalsh.tumblr.com/post/54400376441/playing-detective-with-rolling-shutter-photos"><em>Playing detective with rolling
shutter photos</em></a>.</p>

]]>
    </content>
  </entry>


  <entry>
    <title>Render the Mandelbrot Set with jq</title>
    <link rel="alternate" type="text/html" href="https://nullprogram.com/blog/2016/09/15/"/>
    <id>urn:uuid:605d8165-6c42-324c-e901-aba8d23e60c5</id>
    <updated>2016-09-15T02:39:13Z</updated>
    <category term="media"/><category term="trick"/>
    <content type="html">
      <![CDATA[<p>One of my favorite data processing tools is <a href="https://stedolan.github.io/jq/">jq</a>, a command line
JSON processor. It’s essentially awk for JSON. You supply a small
script composed of <a href="https://github.com/stedolan/jq/wiki/Cookbook">transformations and filters</a>, and jq evaluates
the filters on each input JSON object, producing zero or more outputs
per input. My most common use case is converting JSON data into CSV
with jq’s <code class="language-plaintext highlighter-rouge">@csv</code> filter, which is then fed into SQLite (<a href="/blog/2016/08/12/">another
favorite</a>) for analysis.</p>

<p>On a recent pass over the manual, the <a href="https://stedolan.github.io/jq/manual/#while(cond;update)"><code class="language-plaintext highlighter-rouge">while</code> and <code class="language-plaintext highlighter-rouge">until</code>
filters</a> caught my attention, lighting up <a href="/blog/2016/04/30/">my
Turing-completeness senses</a>. These filters allow jq to compute
an arbitrary recurrence, such as the Mandelbrot set.</p>

<p>Setting that aside for a moment, I said before that an input could
produce zero or more outputs. The zero is when it gets filtered out,
and one output is the obvious case. Some filters produce multiple
outputs from a single input. There are a number of situations when
this happens, but the important one is the <code class="language-plaintext highlighter-rouge">range</code> filter. For
example,</p>

<div class="language-plaintext highlighter-rouge"><div class="highlight"><pre class="highlight"><code>$ echo 6 | jq 'range(1; .)'
1
2
3
4
5
</code></pre></div></div>

<p>The <code class="language-plaintext highlighter-rouge">.</code> is the input object, and <code class="language-plaintext highlighter-rouge">range</code> is producing one output for
every number between 1 and <code class="language-plaintext highlighter-rouge">.</code> (exclusive). If an expression has
multiple filters producing multiple outputs, under some circumstances
jq will produce a Cartesian product: every combination is generated.</p>

<div class="language-plaintext highlighter-rouge"><div class="highlight"><pre class="highlight"><code>$ echo 4 | jq -c '{x: range(1; .), y: range(1; .)}'
{"x":1,"y":1}
{"x":1,"y":2}
{"x":1,"y":3}
{"x":2,"y":1}
{"x":2,"y":2}
{"x":2,"y":3}
{"x":3,"y":1}
{"x":3,"y":2}
{"x":3,"y":3}
</code></pre></div></div>

<p>So if my goal is the Mandelbrot set, I can use this to generate the
complex plane, over which I will run the recurrence. For input, I’ll
use a single object with the keys <code class="language-plaintext highlighter-rouge">x</code>, <code class="language-plaintext highlighter-rouge">dx</code>, <code class="language-plaintext highlighter-rouge">y</code>, and <code class="language-plaintext highlighter-rouge">dy</code>, defining
the domain and range of the image. A reasonable input might be:</p>

<div class="language-json highlighter-rouge"><div class="highlight"><pre class="highlight"><code><span class="p">{</span><span class="nl">"x"</span><span class="p">:</span><span class="w"> </span><span class="p">[</span><span class="mf">-2.5</span><span class="p">,</span><span class="w"> </span><span class="mf">1.5</span><span class="p">],</span><span class="w"> </span><span class="nl">"dx"</span><span class="p">:</span><span class="w"> </span><span class="mf">0.05</span><span class="p">,</span><span class="w"> </span><span class="nl">"y"</span><span class="p">:</span><span class="w"> </span><span class="p">[</span><span class="mf">-1.5</span><span class="p">,</span><span class="w"> </span><span class="mf">1.5</span><span class="p">],</span><span class="w"> </span><span class="nl">"dy"</span><span class="p">:</span><span class="w"> </span><span class="mf">0.1</span><span class="p">}</span><span class="w">
</span></code></pre></div></div>

<p>The “body” of the <code class="language-plaintext highlighter-rouge">until</code> will be the <a href="http://mathworld.wolfram.com/MandelbrotSet.html">Mandelbrot set
recurrence</a>.</p>

<div class="language-plaintext highlighter-rouge"><div class="highlight"><pre class="highlight"><code>z(n+1) = z(n)^2 + c
</code></pre></div></div>

<p>As you might expect, jq doesn’t have support for complex numbers, so
the components will be computed explicitly. <a href="/blog/2012/09/14/">I’ve worked it out
before</a>, so borrowing that I finally had my script:</p>

<div class="language-sh highlighter-rouge"><div class="highlight"><pre class="highlight"><code><span class="c">#!/bin/sh</span>
<span class="nb">echo</span> <span class="s1">'{"x": [-2.5, 1.5], "dx": 0.05, "y": [-1.5, 1.5], "dy": 0.1}'</span> | <span class="se">\</span>
  jq <span class="nt">-jr</span> <span class="s2">"{ </span><span class="se">\</span><span class="s2">
     ci: range(.y[0]; .y[1] + .dy; .dy), </span><span class="se">\</span><span class="s2">
     cr: range(.x[0]; .x[1]; .dx), </span><span class="se">\</span><span class="s2">
     k: 0, </span><span class="se">\</span><span class="s2">
     r: 0, </span><span class="se">\</span><span class="s2">
     i: 0, </span><span class="se">\</span><span class="s2">
   } | until(.r * .r + .i * .i &gt; 4 or .k == 94; { </span><span class="se">\</span><span class="s2">
         cr,
         ci,
         k: (.k + 1),
         r: (.r * .r - .i * .i + .cr),
         i: (.r * .i * 2 + .ci) </span><span class="se">\</span><span class="s2">
       }) </span><span class="se">\</span><span class="s2">
   | [.k + 32] | implode"</span>
</code></pre></div></div>

<p>It iterates to a maximum depth of 94: the number of printable ASCII
characters, except space. The final two filters convert the output
ASCII characters, and the <code class="language-plaintext highlighter-rouge">-j</code> and <code class="language-plaintext highlighter-rouge">-r</code> options tell jq to produce
joined, raw output. So, if you have jq installed and an <strong><em>exactly</em>
80-character wide terminal</strong>, go ahead and run that script. You should
see something like this:</p>

<div class="language-plaintext highlighter-rouge"><div class="highlight"><pre class="highlight"><code>!!!!!!!!!!!!!!!!!!!"""""""""""""""""""""""""""""""""""""""""""""""""""
!!!!!!!!!!!!!!!!!"""""""""""""""""""""""""""""""""""""""""""""""""""""
!!!!!!!!!!!!!!!"""""""""""""""###########"""""""""""""""""""""""""""""
!!!!!!!!!!!!!!"""""""""#########################""""""""""""""""""""""
!!!!!!!!!!!!"""""""################$$$$$%3(%%$$$####""""""""""""""""""
!!!!!!!!!!!"""""################$$$$$$%%&amp;'+)+J%$$$$####"""""""""""""""
!!!!!!!!!!"""################$$$$$$$%%%&amp;()D8+(&amp;%%$$$$#####""""""""""""
!!!!!!!!!""################$$$$$$$%%&amp;&amp;'(.~~~~2(&amp;%%%%$$######""""""""""
!!!!!!!!""##############$$$$$$%%&amp;'(((()*.~~~~-*)(&amp;&amp;&amp;2%$$#####"""""""""
!!!!!!!""#############$$$$%%%%&amp;&amp;',J~0:~~~~~~~~~~4,./0/%$######""""""""
!!!!!!!"###########$$%%%%%%%&amp;&amp;&amp;(.,^~~~~~~~~~~~~~~~~~4'&amp;%$######"""""""
!!!!!!"#######$$$%%','''''''''(+4~~~~~~~~~~~~~~~~~~~1)3%$$######""""""
!!!!!!###$$$$$$%%%&amp;'*04,-C-+))+8~~~~~~~~~~~~~~~~~~~~~/(&amp;$$#######"""""
!!!!!!#$$$$$$%%%%&amp;'(+2~~~~~~~/0~~~~~~~~~~~~~~~~~~~~~~?'%$$$######"""""
!!!!!!$$$$$&amp;&amp;&amp;&amp;'(,-.6~~~~~~~~~A~~~~~~~~~~~~~~~~~~~~~~(&amp;%$$$######"""""
!!!!!!`ce~~ku{~~~~~~~~~~~~~~~~~~~~~~~~~~~~~~~~~~~~~,('&amp;%$$$#######""""
!!!!!!$$$$$&amp;&amp;&amp;&amp;'(,-.6~~~~~~~~~A~~~~~~~~~~~~~~~~~~~~~~(&amp;%$$$######"""""
!!!!!!#$$$$$$%%%%&amp;'(+2~~~~~~~/0~~~~~~~~~~~~~~~~~~~~~~?'%$$$######"""""
!!!!!!###$$$$$$%%%&amp;'*04,-C-+))+8~~~~~~~~~~~~~~~~~~~~~/(&amp;$$#######"""""
!!!!!!"#######$$$%%','''''''''(+4~~~~~~~~~~~~~~~~~~~1)3%$$######""""""
!!!!!!!"###########$$%%%%%%%&amp;&amp;&amp;(.,^~~~~~~~~~~~~~~~~~4'&amp;%$######"""""""
!!!!!!!""#############$$$$%%%%&amp;&amp;',J~0:~~~~~~~~~~4,./0/%$######""""""""
!!!!!!!!""##############$$$$$$%%&amp;'(((()*.~~~~-*)(&amp;&amp;&amp;2%$$#####"""""""""
!!!!!!!!!""################$$$$$$$%%&amp;&amp;'(.~~~~2(&amp;%%%%$$######""""""""""
!!!!!!!!!!"""################$$$$$$$%%%&amp;()D8+(&amp;%%$$$$#####""""""""""""
!!!!!!!!!!!"""""################$$$$$$%%&amp;'+)+L%$$$$####"""""""""""""""
!!!!!!!!!!!!"""""""################$$$$$%3(%%$$$####""""""""""""""""""
!!!!!!!!!!!!!!"""""""""#########################""""""""""""""""""""""
!!!!!!!!!!!!!!!"""""""""""""""###########"""""""""""""""""""""""""""""
!!!!!!!!!!!!!!!!!"""""""""""""""""""""""""""""""""""""""""""""""""""""
!!!!!!!!!!!!!!!!!!!"""""""""""""""""""""""""""""""""""""""""""""""""""
</code></pre></div></div>

<p>Tweaking the input parameters, it scales up nicely:</p>

<p><a href="/img/jq/mandel.gif" class="no-print"><img src="/img/jq/mandel-thumb.gif" alt="" /></a></p>

<p><a href="/img/jq/mandel.png"><img src="/img/jq/mandel-thumb.png" alt="" /></a></p>

<p>As demonstrated by the GIF, it’s <em>very</em> slow <a href="/blog/2015/07/10/">compared to more
reasonable implementations</a>, but I wouldn’t expect otherwise. It
could be turned into <a href="/blog/2007/10/01/">a zoom animation</a> just by feeding it more
input objects with different parameters. It will produce one full
“image” per input. Capturing an animation is left as an exercise for
the reader.</p>

]]>
    </content>
  </entry>


  <entry>
    <title>Lisp Let in GNU Octave</title>
    <link rel="alternate" type="text/html" href="https://nullprogram.com/blog/2012/02/08/"/>
    <id>urn:uuid:05e5318e-0cf4-3d80-4bf5-da695dbe9e47</id>
    <updated>2012-02-08T00:00:00Z</updated>
    <category term="octave"/><category term="trick"/><category term="lisp"/><category term="media"/><category term="math"/><category term="video"/>
    <content type="html">
      <![CDATA[<p>In <a href="/blog/2011/01/30/">BrianScheme</a>, the standard Lisp binding form <code class="language-plaintext highlighter-rouge">let</code> isn’t a
special form. That is, it’s not a hard-coded language feature, or
<em>special form</em>. It’s built on top of <code class="language-plaintext highlighter-rouge">lambda</code>. In any lexically-scoped
Lisp, the expression,</p>

<div class="language-cl highlighter-rouge"><div class="highlight"><pre class="highlight"><code><span class="p">(</span><span class="k">let</span> <span class="p">((</span><span class="nv">x</span> <span class="mi">10</span><span class="p">)</span>
      <span class="p">(</span><span class="nv">y</span> <span class="mi">20</span><span class="p">))</span>
  <span class="p">(</span><span class="nb">*</span> <span class="mi">10</span> <span class="mi">20</span><span class="p">))</span>
</code></pre></div></div>

<p>Can also be written as,</p>

<div class="language-cl highlighter-rouge"><div class="highlight"><pre class="highlight"><code><span class="p">((</span><span class="k">lambda</span> <span class="p">(</span><span class="nv">x</span> <span class="nv">y</span><span class="p">)</span>
   <span class="p">(</span><span class="nb">*</span> <span class="nv">x</span> <span class="nv">y</span><span class="p">))</span>
 <span class="mi">10</span> <span class="mi">20</span><span class="p">)</span>
</code></pre></div></div>

<p>BrianScheme’s <code class="language-plaintext highlighter-rouge">let</code> is just a macro that transforms into a lambda
expression. This is also what made it so important to implement lambda
lifting, to optimize these otherwise-expensive forms.</p>

<p>It’s possible to achieve a similar effect in GNU Octave (but not
Matlab, due to <a href="/blog/2008/08/29/">its flawed parser design</a>). The language permits
simple lambda expressions, much like Python.</p>

<div class="language-matlab highlighter-rouge"><div class="highlight"><pre class="highlight"><code><span class="o">&gt;</span> <span class="n">f</span> <span class="o">=</span> <span class="o">@</span><span class="p">(</span><span class="n">x</span><span class="p">)</span> <span class="n">x</span> <span class="o">+</span> <span class="mi">10</span><span class="p">;</span>
<span class="o">&gt;</span> <span class="n">f</span><span class="p">(</span><span class="mi">4</span><span class="p">)</span>
<span class="nb">ans</span> <span class="o">=</span> <span class="mi">14</span>
</code></pre></div></div>

<p>It can be used to create a scope in a language that’s mostly devoid of
scope. For example, I can avoid assigning a value to a temporary
variable just because I need to use it in two places. This one-liner
generates a random 3D unit vector.</p>

<div class="language-matlab highlighter-rouge"><div class="highlight"><pre class="highlight"><code><span class="p">(</span><span class="o">@</span><span class="p">(</span><span class="n">v</span><span class="p">)</span> <span class="n">v</span> <span class="p">/</span> <span class="nb">norm</span><span class="p">(</span><span class="n">v</span><span class="p">))(</span><span class="nb">randn</span><span class="p">(</span><span class="mi">1</span><span class="p">,</span> <span class="mi">3</span><span class="p">))</span>
</code></pre></div></div>

<p>The anonymous function is called inside the same expression where it’s
created. In practice, doing this is stupid. It’s confusing and there’s
really nothing to gain by being clever, doing it in one line instead
of two. Most importantly, there’s no macro system that can turn this
into a new language feature. <em>However</em>, I enjoyed using this technique
to create a one-liner that generates <code class="language-plaintext highlighter-rouge">n</code> random unit vectors.</p>

<div class="language-matlab highlighter-rouge"><div class="highlight"><pre class="highlight"><code><span class="n">n</span> <span class="o">=</span> <span class="mi">1000</span><span class="p">;</span>
<span class="n">p</span> <span class="o">=</span> <span class="p">(</span><span class="o">@</span><span class="p">(</span><span class="n">v</span><span class="p">)</span> <span class="n">v</span> <span class="o">.</span><span class="p">/</span> <span class="nb">repmat</span><span class="p">(</span><span class="nb">sqrt</span><span class="p">(</span><span class="nb">sum</span><span class="p">(</span><span class="nb">abs</span><span class="p">(</span><span class="n">v</span><span class="p">)</span> <span class="o">.^</span> <span class="mi">2</span><span class="p">,</span> <span class="mi">2</span><span class="p">)),</span> <span class="mi">1</span><span class="p">,</span> <span class="mi">3</span><span class="p">))(</span><span class="nb">randn</span><span class="p">(</span><span class="n">n</span><span class="p">,</span> <span class="mi">3</span><span class="p">));</span>
</code></pre></div></div>

<p>Why was I doing this? I was using the Monte Carlo method to
double-check my solution to <a href="http://godplaysdice.blogspot.com/2011/12/geometric-probability-problem.html">this math problem</a>:</p>

<blockquote>
  <p>What is the average straight line distance between two points on a
sphere of radius 1?</p>
</blockquote>

<p>I was also demonstrating to <a href="http://devrand.org/">Gavin</a> that simply choosing two
<em>angles</em> is insufficient, because the points the angles select are not
evenly distributed over the surface of the sphere. I generated this
video, where the poles are clearly visible due to the uneven selection
by two angles.</p>

<video src="https://s3.amazonaws.com/nullprogram/sphere/sphere-dark.webm" controls="controls" height="340" width="340">
</video>

<p>This took hours to render with gnuplot! Here are stylized versions:
<a href="https://s3.amazonaws.com/nullprogram/sphere/dark.html">Dark</a> and <a href="https://s3.amazonaws.com/nullprogram/sphere/light.html">Light</a>.</p>

]]>
    </content>
  </entry>


  <entry>
    <title>Poor Man's Video Editing</title>
    <link rel="alternate" type="text/html" href="https://nullprogram.com/blog/2011/11/28/"/>
    <id>urn:uuid:61996984-69d4-3615-64f1-1c2363199cbc</id>
    <updated>2011-11-28T00:00:00Z</updated>
    <category term="media"/><category term="tutorial"/><category term="trick"/>
    <content type="html">
      <![CDATA[<p>I’ve done all my video editing in a very old-school, unix-style way. I
actually have no experience with real video editing software, which
may explain why I tolerate the manual process. Instead, I use several
open source tools, none of which are designed specifically for video
editing.</p>

<ul>
  <li><a href="http://www.mplayerhq.hu/">MPlayer</a></li>
  <li><a href="http://www.imagemagick.org/">ImageMagick</a> (or any batch image editing tool)</li>
  <li><a href="http://mjpeg.sourceforge.net/">ppmtoy4m</a></li>
  <li>The <a href="http://www.webmproject.org/">WebM encoder</a> (or your preferred encoder)</li>
</ul>

<p>The first three are usually available from your Linux distribution
repositories, making them trivial to obtain. The last one is easy to
obtain and compile.</p>

<p><del>If you’re using a modern browser, you should have noticed my
portrait on the left-hand side changed recently</del> (update: it’s been
removed). That’s an HTML5 WebM video — currently with Ogg Theora
fallback due to a GitHub issue. To cut the video down to that portrait
size, I used the above four tools on the original video.</p>

<p>WebM seems to be becoming the standard HTML5 video format. Google is
pushing it and it’s supported by all the major browsers, except
Safari. So, unless something big happens, I plan on going with WebM
for web video in the future.</p>

<p>To begin, <a href="/blog/2007/12/11/">as I’ve done before</a>, split the video
into its individual frames,</p>

<div class="language-plaintext highlighter-rouge"><div class="highlight"><pre class="highlight"><code>mplayer -vo jpeg -ao dummy -benchmark video_file
</code></pre></div></div>

<p>The <code class="language-plaintext highlighter-rouge">-benchmark</code> option hints for <code class="language-plaintext highlighter-rouge">mplayer</code> to go as fast as possible,
rather than normal playback speed.</p>

<p>Next look through the output frames and delete any unwanted frames to
keep, such as the first and last few seconds of video. With the
desired frames remaining, use ImageMagick, or any batch image editing
software, to crop out the relevant section of the images. This can be
done in parallel with <code class="language-plaintext highlighter-rouge">xargs</code>’ <code class="language-plaintext highlighter-rouge">-P</code> option — to take advantage of
multiple cores if disk I/O isn’t being the bottleneck.</p>

<div class="language-plaintext highlighter-rouge"><div class="highlight"><pre class="highlight"><code>ls *.jpg | xargs -I{} -P5 convert {} 312x459+177+22 {}.ppm
</code></pre></div></div>

<p>That crops out a 312 by 459 section of the image, with the top-left
corner at (177, 22). Any other <code class="language-plaintext highlighter-rouge">convert</code> filters can be stuck in there
too. Notice the output format is the
<a href="http://en.wikipedia.org/wiki/Netpbm_format">portable pixmap</a> (<code class="language-plaintext highlighter-rouge">ppm</code>),
which is significant because it won’t introduce any additional loss
and, most importantly, it is required by the next tool.</p>

<p>If I’m happy with the result, I use <code class="language-plaintext highlighter-rouge">ppmtoy4m</code> to pipe the new frames
to the encoder,</p>

<div class="language-plaintext highlighter-rouge"><div class="highlight"><pre class="highlight"><code>cat *.ppm | ppmtoy4m | vpxenc --best -o output.webm -
</code></pre></div></div>

<p>As the name implies, <code class="language-plaintext highlighter-rouge">ppmtoy4m</code> converts a series of portable pixmap
files into a
<a href="http://wiki.multimedia.cx/index.php?title=YUV4MPEG2">YUV4MPEG2</a>
(<code class="language-plaintext highlighter-rouge">y4m</code>) video stream. YUV4MPEG2 is the bitmap of the video world:
gigantic, lossless, uncompressed video. It’s exactly the kind of thing
you want to hand to a video encoder. If you need to specify any
video-specific parameters, <code class="language-plaintext highlighter-rouge">ppmtoy4m</code> is the tool that needs to know
it. For example, to set the framerate to 10 FPS,</p>

<div class="language-plaintext highlighter-rouge"><div class="highlight"><pre class="highlight"><code>... | ppmtoy4m -F 10:1 | ...
</code></pre></div></div>

<p><code class="language-plaintext highlighter-rouge">ppmtoy4m</code> is a classically-trained unix tool: stdin to stdout. No
need to dump that raw video to disk, just pipe it right into the WebM
encoder. If you choose a different encoder, it might not support
reading from stdin, especially if you do multiple passes. A possible
workaround would be a named pipe,</p>

<div class="language-plaintext highlighter-rouge"><div class="highlight"><pre class="highlight"><code>mkfifo video.y4m
cat *.ppm | ppmtoy4m &gt; video.y4m &amp;
otherencoder video.4pm
</code></pre></div></div>

<p>For WebM encoding, I like to use the <code class="language-plaintext highlighter-rouge">--best</code> option, telling the
encoder to take its time to do a good job. To do two passes and get
even more quality per byte (<code class="language-plaintext highlighter-rouge">--passes=2</code>) a pipe cannot be used and
you’ll need to write the entire raw video onto the disk. If you try to
pipe it anyway, <code class="language-plaintext highlighter-rouge">vpxenc</code> will simply crash rather than give an error
message (as of this writing). This had me confused for awhile.</p>

<p>To produce Ogg Theora instead of WebM,
<a href="http://v2v.cc/~j/ffmpeg2theora/">ffmpeg2theora</a> is a great tool. It’s
well-behaved on the command line and can be dropped in place of
<code class="language-plaintext highlighter-rouge">vpxenc</code>.</p>

<p>To do audio, encode your audio stream with your favorite audio encoder
(Vorbis, Lame, etc.) then merge them together into your preferred
container. For example, to add audio to a WebM video (i.e. Matroska),
use <code class="language-plaintext highlighter-rouge">mkvmerge</code> from <a href="http://www.bunkus.org/videotools/mkvtoolnix/">MKVToolNix</a>,</p>

<div class="language-plaintext highlighter-rouge"><div class="highlight"><pre class="highlight"><code>mkvmerge --webm -o combined.webm video.webm audio.ogg
</code></pre></div></div>

<p><em>Extra notes update</em>: There’s a bug in imlib2 where it can’t read PPM
files that have no initial comment, so some tools, including GIMP and
QIV, can’t read PPM files produced by ImageMagick. Fortunately
<code class="language-plaintext highlighter-rouge">ppmtoy4m</code> is unaffected. However, there <em>is</em> a bug in <code class="language-plaintext highlighter-rouge">ppmtoy4m</code>
where it can’t read PPM files with a depth other than 8 bits. Fix this
by giving the option <code class="language-plaintext highlighter-rouge">-depth 8</code> to ImageMagick’s <code class="language-plaintext highlighter-rouge">convert</code>.</p>
]]>
    </content>
  </entry>


  <entry>
    <title>Some Cool Shell Aliases</title>
    <link rel="alternate" type="text/html" href="https://nullprogram.com/blog/2011/11/03/"/>
    <id>urn:uuid:98001174-3eda-3ae3-9131-943831f4d5fa</id>
    <updated>2011-11-03T00:00:00Z</updated>
    <category term="trick"/>
    <content type="html">
      <![CDATA[<p>Over the last couple of years I’ve worked out some cool shell tricks,
which I use as aliases. Like any good software developer, if I notice
a pattern I take steps to generalize and reduce it. For shells, it
might be as simple as replacing a regularly typed long command with a
short alias, but the coolest tricks are the ones that reduce an entire
habit.</p>

<p>The first one is the singleton pattern. Say you have a terminal
program that should only have a single process instance but should
only start on demand. Some programs may enforce that rule, if it makes
sense to, but some do not.</p>

<p>In my case, that program was
<a href="http://libtorrent.rakshasa.no/">rtorrent</a>. I only want a single
instance of this program running at a time, but I also don’t want to
have to think about whether or not I’ve started it already. I always
run it in <a href="/blog/2009/03/05/"><code class="language-plaintext highlighter-rouge">screen</code></a> so that I can detach it and
let it run in the background. My shell habits looked like this.</p>

<div class="language-plaintext highlighter-rouge"><div class="highlight"><pre class="highlight"><code># Assume it's there already
$ screen -r rtorrent
# If not, fire it up
$ screen -S rtorrent rtorrent
</code></pre></div></div>

<p>If I needed to start rtorrent for the first time I was often typing in
that first command just to see it fail. Fortunately, it really does
fail: the exit code is non-zero. This allows me to make this cool
alias,</p>

<div class="language-bash highlighter-rouge"><div class="highlight"><pre class="highlight"><code><span class="nb">alias </span><span class="nv">rt</span><span class="o">=</span><span class="s1">'screen -r rtorrent || screen -S rtorrent rtorrent'</span>
</code></pre></div></div>

<p>Either it attaches to the existing instance or fires a new one up for
me and attaches me to that one. Now, there <em>is</em> a race condition
here. That “or” operator isn’t atomic, so something else might spawn
an rtorrent instance in between check and creation. Since I’m only ever
running this by hand, and there is only one of me, that’s not a problem.</p>

<p>The next trick has to do with
<a href="/blog/2010/09/21/">my habit of throwing up a temporary web server</a>
when I need to share files. I noticed that I would launch it, run it
for a minute, kill it, run one or two commands, and launch it
again. For example, if I’m working on a program and I want to share
the build with someone else. I might drop out of it just to do
something with git and rebuild. Once again, my alias fix involves
<code class="language-plaintext highlighter-rouge">screen</code>,</p>

<div class="language-bash highlighter-rouge"><div class="highlight"><pre class="highlight"><code><span class="nb">alias </span><span class="nv">httpd</span><span class="o">=</span><span class="s1">'screen -S http python -m SimpleHTTPServer 8080'</span>
</code></pre></div></div>

<p>Rather than kill the server only to restart it again, I always run it
in <code class="language-plaintext highlighter-rouge">screen</code>. So instead I detach, but I don’t even need to bother
reattaching.</p>

<p>This next one is my Emacs alias. Emacs has the really, really cool
ability to become a daemon. You can launch a daemon instance, then
connect to it as needed with clients to do your editing (<code class="language-plaintext highlighter-rouge">emacsclient
--create-frame</code> or just <code class="language-plaintext highlighter-rouge">-c</code>). This allows your Emacs session to live
for a long time, preserving all your buffers. Long-living sessions are
<a href="/blog/2011/01/30/">an old Lisp tradition</a>. Also, being a daemon
eliminates any lengthy startup penalty, because it only happens once
after reboot.</p>

<div class="language-plaintext highlighter-rouge"><div class="highlight"><pre class="highlight"><code>$ emacs --daemon
$ emacsclient -c
# Close it and sometime later start another client
$ emacsclient -c
</code></pre></div></div>

<p>This is another case of the single-instance problem. However, Emacs is
really smart about managing this by itself. It has an argument,
<code class="language-plaintext highlighter-rouge">--alternate-editor</code> (<code class="language-plaintext highlighter-rouge">-a</code>), which allows you to specify another
editor to use in case the daemon isn’t started.</p>

<div class="language-plaintext highlighter-rouge"><div class="highlight"><pre class="highlight"><code>emacsclient -ca nano
</code></pre></div></div>

<p>The most important part of this option is its hidden feature. When the
argument is empty it defaults to launching a daemon. No need to launch
it manually, it’s just one command.</p>

<div class="language-bash highlighter-rouge"><div class="highlight"><pre class="highlight"><code><span class="nb">alias </span><span class="nv">e</span><span class="o">=</span><span class="s1">'emacsclient -cna ""'</span>
</code></pre></div></div>

<p>Naturally, Emacs gets to be in one of the coveted, single-letter
slots. I also set one up for terminal mode Emacs (<code class="language-plaintext highlighter-rouge">-t</code> instead of
<code class="language-plaintext highlighter-rouge">-c</code>),</p>

<div class="language-bash highlighter-rouge"><div class="highlight"><pre class="highlight"><code><span class="nb">alias </span><span class="nv">et</span><span class="o">=</span><span class="s1">'emacsclient -ta ""'</span>
</code></pre></div></div>

<p>And just to teach the editor heathens a lesson or two, this command
has a second alias,</p>

<div class="language-bash highlighter-rouge"><div class="highlight"><pre class="highlight"><code><span class="nb">alias </span><span class="nv">vi</span><span class="o">=</span><span class="s1">'emacsclient -ta ""'</span>
</code></pre></div></div>

<p>The final trick is one I just figured out this week, and it involves
passphrase agents. Just in case you are not familiar, both <code class="language-plaintext highlighter-rouge">ssh</code> and
<code class="language-plaintext highlighter-rouge">gpg</code> have daemons which will securely store your passphrases for
you.</p>

<p><em>Update June 2012:</em> I <a href="/blog/2012/06/08/">have a better solution</a> for
this problem.</p>

<p>OpenSSH is loaded with extremely useful functionality. One of them is
key authentication. Rather than use a password to log into a system,
you can prove your identity cryptographically — you solve a math
problem that <em>only</em> you have the information to solve. This is
invaluable to Git, because it allows for passwordless access to remote
repositories. You can host a repository for a bunch of users without
the awkward password step (“Pst … your password is <code class="language-plaintext highlighter-rouge">passwordABC</code>.
Change it after you first log in.”). Instead, they all send you their
public keys.</p>

<p>To use this feature, you first you generate a public/private keypair
for yourself, which gets stored in <code class="language-plaintext highlighter-rouge">~/.ssh/id_rsa</code> and
<code class="language-plaintext highlighter-rouge">~/.ssh/id_rsa.pub</code>.</p>

<div class="language-plaintext highlighter-rouge"><div class="highlight"><pre class="highlight"><code>$ ssh-keygen
</code></pre></div></div>

<p>At one point in this process you will be asked for a passphrase, which
is used to encrypt your private key. At first you might wonder why you
bother with the key at all if you’re going to encrypt it. Rather than
enter a password to log into a system, you have to enter a passphrase,
which is even worse because it’s longer. So you don’t bother with a
passphrase. This is dangerous because it’s practically the same as
storing your login password in a file! If someone got a hold of your
private key file, they have full access to your systems.</p>

<p>This is where <code class="language-plaintext highlighter-rouge">ssh-agent</code> comes in. It runs as a service in the
background. You register your private key with it with <code class="language-plaintext highlighter-rouge">ssh-add</code> and
it queries for your passphrase, storing it in memory. It’s very
careful about this. It’s stored on a memory page that has been
registered with the operating system such that it’s never written to
permanent storage (swap). When the process dies, or zeros out that
memory, the passphrase is completely lost.</p>

<p>GnuPG’s daemon, <code class="language-plaintext highlighter-rouge">gpg-agent</code>, works very similarly. It holds onto your
PGP passphrase so you can perform a number of actions with it without
needing to enter it a bunch of times.</p>

<p><code class="language-plaintext highlighter-rouge">gpg</code> and <code class="language-plaintext highlighter-rouge">ssh</code> know how communicate with their agents through
information stored in environmental variables. However, this creates a
problem when launching the agents. They can’t change the environment
of their parent process, your shell. The easiest way to do it is to
reverse the relationship, with the agent becoming the parent of your
shell.</p>

<div class="language-plaintext highlighter-rouge"><div class="highlight"><pre class="highlight"><code>$ exec ssh-agent bash
</code></pre></div></div>

<p>This tells <code class="language-plaintext highlighter-rouge">ssh-agent</code> to launch a new shell with the proper
environment. In case you’re not familiar, the <code class="language-plaintext highlighter-rouge">exec</code> causes the new
shell replace the current one. It’s the same <code class="language-plaintext highlighter-rouge">exec()</code> as the POSIX
function. You could leave it off, but you’ll be left with nested
shells, which can be very confusing.</p>

<p>GnuPG’s agent is launched like this,</p>

<div class="language-plaintext highlighter-rouge"><div class="highlight"><pre class="highlight"><code>$ exec gpg-agent --daemon bash
</code></pre></div></div>

<p>My problem was that I often want both of these at the same time. I
could run them back to back, but making them into a single, alias-able
command is tricky. This naive expression will not work,</p>

<div class="language-plaintext highlighter-rouge"><div class="highlight"><pre class="highlight"><code>$ exec ssh-agent bash &amp;&amp; exec gpg-agent bash
</code></pre></div></div>

<p>The first <code class="language-plaintext highlighter-rouge">exec</code> causes the current shell to end, so the second part
is never evaluated. I can’t simply remove the <code class="language-plaintext highlighter-rouge">exec</code>s and live with
nested shells because the next agent isn’t launched until the first
agent’s shell dies. The very cool solution is to chain them together!</p>

<div class="language-bash highlighter-rouge"><div class="highlight"><pre class="highlight"><code><span class="nb">alias </span><span class="nv">agent</span><span class="o">=</span><span class="s1">'exec ssh-agent gpg-agent --daemon bash'</span>
</code></pre></div></div>

<p>The current shell turns into the <code class="language-plaintext highlighter-rouge">ssh-agent</code>, which spawns <code class="language-plaintext highlighter-rouge">gpg-agent</code>
with the proper environment for <code class="language-plaintext highlighter-rouge">ssh</code>, which forwards its environment
along to spawn a new shell with the proper environment for both.</p>

<p>If I ever need another agent I just add it to the chain. That command
should probably be at the end of my <code class="language-plaintext highlighter-rouge">.bashrc</code> or something, but it’s
just an alias for now. Sometimes I log into X first, sometimes <code class="language-plaintext highlighter-rouge">ssh</code>
first, so I’m not sure what the correct place would be.</p>
]]>
    </content>
  </entry>


  <entry>
    <title>Throw Up a Quick HTTP Server</title>
    <link rel="alternate" type="text/html" href="https://nullprogram.com/blog/2010/09/21/"/>
    <id>urn:uuid:304e4ffe-8840-3de4-c371-288959fd4a10</id>
    <updated>2010-09-21T00:00:00Z</updated>
    <category term="trick"/>
    <content type="html">
      <![CDATA[<!-- 21 September 2010 -->
<p>
Ever since I learned
<a href="http://www.terminally-incoherent.com/blog/2010/04/08/exchanging-files-over-the-network-the-easy-way/">
this neat trick from Luke</a> a few months ago I've been using it
almost weekly. If you have Python installed then you have a miniature
web server at your fingertips.
</p>
<pre>
python -m SimpleHTTPServer
</pre>
<p>
Bam! If I need to transfer large files directly to someone over the
Internet, I'll throw up one of these and give them the address. Each
of my home computers has an 8<i>xxx</i> port forwarded to it in my
router's NAT configuration, so they're all ready to do this any time I
need it.
</p>
<p>
When I needed this before, I would use my
own <a href="/blog/2009/05/17/"> Emacs web server</a>, but the Python
solution above is even more convenient most of the time. Plus it does
directory listings, which I never bothered to add to my web server.
</p>
<p>
The reason I bring it up right now is because it finally saved me a
lot of time at work. I was performing a half dozen Ubuntu installs for
a system we're building, but none of these computers have network
access, except to each other. I was using the Ubuntu DVD, which
includes a larger software selection than the CD.
</p>
<p>
Well, it seems no one ever actually uses the DVD like this, because it
doesn't work right now with the current DVD. You see, <code>apt</code>
doesn't treat the DVD as just any repository. It has its own special
cache for them, keeping track of what packages are on what CDs and
DVDs. Well, the problem is that the CD is named differently than the
DVD, and <code>apt</code> (and <code>apt-cdrom</code>) keeps looking
for the CD when it should be looking for the DVD, foolishly ignoring
any advice I give in the configuration. Python SimpleHTTPServer to the
rescue!
</p>
<p>
I mounted the DVD and ran the HTTP server at the DVD's root. Then I
added my localhost server to the <code>sources.list</code>. Worked
like a charm! <code>apt</code> had no idea it was pulling packages off
the DVD.
</p>
]]>
    </content>
  </entry>


  <entry>
    <title>Middleman Parallelization</title>
    <link rel="alternate" type="text/html" href="https://nullprogram.com/blog/2010/09/08/"/>
    <id>urn:uuid:3b6a0051-bfb6-3ac0-5b9e-9286aa0b4e5a</id>
    <updated>2010-09-08T00:00:00Z</updated>
    <category term="trick"/>
    <content type="html">
      <![CDATA[<!-- 8 September 2010 -->
<p>
I recently discovered a very clever tool
called <a href="http://mdm.berlios.de/usage.html">Middleman</a>. It's
a quick way to set up and manage multiple-process workload queue. The
process output and display is done inside of a screen session, so if
it's going to take awhile you can just detach and check on it again
later. In the past I used <code>make</code>'s <code>-j</code> option
to do this, but that's always a pain to set up.
</p>
<p>
It is composed of three
programs: <code>mdm.screen</code>, <code>mdm-run</code>,
and <code>mdm-sync</code>. The first is the top level supervisor that
you use to launch the enhanced shell script. The second prefixes every
command to be run in parallel. The third is prefixes the final command
that depends on all of the individual processes.
</p>
<p>
The linked Middleman page has a good example, but I'll share my own
anyway. I used it over the weekend to download a long series of videos
with <a href="http://rg3.github.com/youtube-dl/">
youtube-dl</a>. Because the transfer rate for a single video is
throttled I wanted to grab several at a time, but I also didn't want
to grab them <i>all</i> at the same time. Here's the dumb version of
the script, <code>download.sh</code>, that does them all at once.
</p>
<pre>
#!/bin.sh
youtube-dl -t http://www.youtube.com/watch?v=<i>XXXXXXXXXX0</i> &amp;
youtube-dl -t http://www.youtube.com/watch?v=<i>XXXXXXXXXX1</i> &amp;
youtube-dl -t http://www.youtube.com/watch?v=<i>XXXXXXXXXX2</i> &amp;
youtube-dl -t http://www.youtube.com/watch?v=<i>XXXXXXXXXX3</i> &amp;
youtube-dl -t http://www.youtube.com/watch?v=<i>XXXXXXXXXX4</i> &amp;
youtube-dl -t http://www.youtube.com/watch?v=<i>XXXXXXXXXX5</i> &amp;
youtube-dl -t http://www.youtube.com/watch?v=<i>XXXXXXXXXX6</i> &amp;
youtube-dl -t http://www.youtube.com/watch?v=<i>XXXXXXXXXX7</i> &amp;
youtube-dl -t http://www.youtube.com/watch?v=<i>XXXXXXXXXX8</i> &amp;
</pre>
<p>
With Middleman all I had to do was this,
</p>
<pre>
#!/bin/sh
<b>mdm-run</b> youtube-dl -t http://www.youtube.com/watch?v=<i>XXXXXXXXXX0</i>
<b>mdm-run</b> youtube-dl -t http://www.youtube.com/watch?v=<i>XXXXXXXXXX1</i>
<b>mdm-run</b> youtube-dl -t http://www.youtube.com/watch?v=<i>XXXXXXXXXX2</i>
<b>mdm-run</b> youtube-dl -t http://www.youtube.com/watch?v=<i>XXXXXXXXXX3</i>
<b>mdm-run</b> youtube-dl -t http://www.youtube.com/watch?v=<i>XXXXXXXXXX4</i>
<b>mdm-run</b> youtube-dl -t http://www.youtube.com/watch?v=<i>XXXXXXXXXX5</i>
<b>mdm-run</b> youtube-dl -t http://www.youtube.com/watch?v=<i>XXXXXXXXXX6</i>
<b>mdm-run</b> youtube-dl -t http://www.youtube.com/watch?v=<i>XXXXXXXXXX7</i>
<b>mdm-run</b> youtube-dl -t http://www.youtube.com/watch?v=<i>XXXXXXXXXX8</i>
</pre>
<p>
Then just launch the script with <code>mdm.screen</code>. It defaults
to 6 processes at a time, but you can adjust it to whatever you want
with the <code>-n</code> switch. I used 4.
</p>
<pre>
$ mdm.screen -n 4 ./download.sh
</pre>
<p>
There is a screen window that lists the process queue and highlights
the currently active jobs. I could switch between screen windows to
see the output from individual processes and see how they were doing.
</p>
<p>
From the perspective of the shell script, the first four commands
finish instantly but fifth command will block. As soon as Middleman
sees one of the first four processes complete the fifth one will begin
work, returning control to the shell script, and the sixth command
will block, since the queue is full again.
</p>
<p>
I'm sure I'll be using this more in the future, especially for tasks
like batch audio and video encoding. I bet this could be useful on
a <a href="/blog/2007/09/17/">cluster</a>.
</p>
]]>
    </content>
  </entry>


  <entry>
    <title>Identifying Files</title>
    <link rel="alternate" type="text/html" href="https://nullprogram.com/blog/2010/05/20/"/>
    <id>urn:uuid:be4f6a39-11d0-3963-8ade-1ff1bbf4d904</id>
    <updated>2010-05-20T00:00:00Z</updated>
    <category term="trick"/><category term="tutorial"/>
    <content type="html">
      <![CDATA[<!-- 20 May 2010 -->
<p>
At work I currently spend about a third of my time
doing <a href="http://en.wikipedia.org/wiki/Data_reduction"> data
reduction</a>, and it's become one of my favorite tasks.
(I've <a href="https://github.com/skeeto/binitools"> done it on my
own</a> too). Data come in from various organizations and sponsors in
all sorts of strange formats. We have a bunch of fancy analysis tools
to work on the data, but they aren't any good if they can't read the
format. So I'm tasked with writing tools to convert incoming data into
a more useful format.
</p>
<p>
If the source file is a text-based file it's usually just a matter of
writing a parser — possibly including a grammar — after carefully
studying the textual structure. Binary files are trickier.
Fortunately, there are a few tools that come in handy for identifying
the format of a strange binary file.
</p>
<p>
The first is the standard utility found on any unix-like
system: <a href="http://packages.debian.org/sid/file"> <code>file</code>
</a>. I have no idea if it has an official website because it's a term
that's impossible to search for. It tries to identify a file based on
the magic numbers and other tests, none based on the actual
file name. I've never been to lucky to have <code>file</code> recognize
a strange format at work. But silence speaks volumes: it means the
data are not packed into something common, like a simple zip archive.
</p>
<p>
Next, I take a look at the file
with <a href="http://www.fourmilab.ch/random/">ent</a>, a pseudo-random
number sequence test program. This will reveal how compressed (or even
encrypted) data are. If ent says the data are very dense, say 7 bits
per byte or more, the format is employing a good compression
algorithm. The next step would be tackling that so I can start over on
the uncompressed contents. If it's something like 4 bits per byte
there's no compression. If it's in between then it might be employing
a weak, custom compression algorithm. I've always seen the latter two.
</p>
<p>
Next I dive in with a hex editor. I use a combination of
Emacs' <code>hexl-mode</code> and the standard BSD
tool <a href="http://code.google.com/p/hexdump/"> hexdump</a> (for
something more static). One of the first things I like to identify is
byte order, and in a hex dump it's often obvious.
</p>
<p>
In general, better designed formats use big endian, also known as
network order. That's the standard ordering used in communication,
regardless of the native byte ordering of the network clients. The
amateur, home-brew formats are generally less thoughtful and dump out
whatever the native format is, usually little endian because that's
what x86 is. Worse, they'll also generate data on architectures that
are big endian, so you can get it both ways without any warning. In
that case your conversion tool has to be sensitive to byte order and
find some way to identify which ordering a file is using. A time-stamp
field is very useful here, because a 64-bit time-stamp read with the
wrong byte order will give a very unreasonable date.
</p>
<p>
For example, here's something I see often.
</p>
<pre>
eb 03 00 00 35 00 00 00 66 1e 00 00
</pre>
<p>
That's most likely 3 4-byte values, in little endian byte order. The
zeros make the integers stand out.
</p>
<pre>
eb 03 00 00 <b>35 00 00 00</b> 66 1e 00 00
</pre>
<p>
We can tell it's little endian because the non-zero digits are on the
left. This information will be useful in identifying more bytes in the
file.
</p>
<p>
Next I'd look for headers, common strings of bytes, so that I can
identify larger structures in the data. I've never had to reverse
engineer a format ... yet. I'm not sure if I could. Once I got this
far I've always been able to research the format further and find
either source code or documentation, revealing everything to me.
</p>
<p>
If the file contains strings I'll dump them out
with <a href="http://en.wikipedia.org/wiki/Strings_(Unix)">
<code>strings</code></a>. I haven't found this too useful at work, but
<a href="/blog/2009/04/18/">it's been useful at home</a>.
</p>
<p>
And there's something still useful beyond these. Something I made
myself at home for a completely different purpose, but I've exploited
its side effects: my <a href="https://github.com/skeeto/pngarch"> PNG
Archiver</a>. The original purpose of the tool is to store a file in
an image, as images are easier to share with others. The side effect
is that by viewing the image I get to see the structure of the
file. For example, here's my laptop's <code>/bin/ls</code>, very
roughly labeled.
</p>
<p class="center">
<img src="/img/pngarch/bin-ls.png" alt="The different segments of the ELF binary are easily visible."/>
</p>
<p>
It's easy to spot the different segments of the ELF format. Higher
entropy sections are more brightly colored. Strings, being composed of
ASCII-like text, have their MSB's unset, which is why they're
darker. Any non-compressed format will have an interesting profile
like this. Here's a Word doc, an infamously horrible format,
</p>
<p class="center">
  <img src="/img/pngarch/word-doc.png" alt=""/>
</p>
<p>
And here's some Emacs bytecode. You can tell the code vectors apart
from the constants section below it.
</p>
<p class="center">
  <img src="/img/pngarch/elc.png" alt=""/>
</p>
<p>
If you find yourself having to inspect strange files, keep these tools
around to make the job easier.
</p>
]]>
    </content>
  </entry>


  <entry>
    <title>Magick Thumbnails</title>
    <link rel="alternate" type="text/html" href="https://nullprogram.com/blog/2009/12/21/"/>
    <id>urn:uuid:54f0b0cc-56d2-3260-9bfc-339c1c7fc0fb</id>
    <updated>2009-12-21T00:00:00Z</updated>
    <category term="trick"/>
    <content type="html">
      <![CDATA[<!-- 21 December 2009 -->
<p>
For a long time I couldn't figure out how to make decent thumbnails
with <a href="http://www.imagemagick.org/script/index.php">
ImageMagick</a>. Specifically, I wanted to create uniform sized
thumbnails from arbitrary images. Over the weekend I came across the
<a href="http://www.imagemagick.org/Usage/thumbnails/#cut">
ImageMagick Examples page</a>, which shows exactly how to do
this. Here's the command for a 150x150 thumbnail,
</p>
<pre>
convert orig.jpg -thumbnail 150x150^ -gravity center \
        -extent 150x150 thumb.jpg
</pre>
<p>
It cuts out the largest square possible from the center of the image
and resizes that to 150x150. This capability has actually only been
available for 2 years now! It wasn't there last time I needed it.
</p>
<p>
I can think of one way to improve it: instead of selecting the center,
it selects the area with the highest information density. This could
be measured by edge detection, corner detection, or some other
statistical method. It would be selected by changing the gravity
option to, say, "entropy".
</p>
<p>
I'm listing this here mostly for my own future reference. :-)
</p>
]]>
    </content>
  </entry>


  <entry>
    <title>GNU Screen</title>
    <link rel="alternate" type="text/html" href="https://nullprogram.com/blog/2009/03/05/"/>
    <id>urn:uuid:e7bb66e3-6ce2-3930-0307-953f71614f84</id>
    <updated>2009-03-05T00:00:00Z</updated>
    <category term="trick"/>
    <content type="html">
      <![CDATA[<!-- 5 March 2009 -->
<p>
Another useful program I use every week is <a
href="http://www.gnu.org/software/screen/"> GNU Screen</a>. It
provides virtual terminals at a single terminal. It's a bit like a
window manager for a text terminal. If you are a command line junkie
(and if you are at all serious about computing, you should be), this
is an essential piece of software.
</p>
<p>
The main reason I use screen is for its persistence. If I am running a
long-running job on a remote machine (i.e. over ssh), like a large
<code>apt-get upgrade</code>, I'll put it in a screen session. This
way I can log out and, later, log in from anywhere and check on it. I
have even used it to persist <a href="/blog/2008/09/17/"> nethack</a>
sessions, though this isn't really necessary.
</p>
<p>
The only annoying part is that all of it's mappings are underneath C-a
(ctrl+a), which is a very common Emacs/bash command, which I use a
lot. To get the effect of C-a inside screen, you have to do it twice
in a row because screen captures the first one.
</p>
<p>
If you don't already use it, try it out sometime.
</p>
]]>
    </content>
  </entry>


  <entry>
    <title>Readline Wrap</title>
    <link rel="alternate" type="text/html" href="https://nullprogram.com/blog/2009/02/20/"/>
    <id>urn:uuid:20836697-8c00-3132-afab-dff5eedf91ed</id>
    <updated>2009-02-20T00:00:00Z</updated>
    <category term="trick"/>
    <content type="html">
      <![CDATA[<!-- 20 February 2009 -->
<p>
I came across a very interesting tool the other day called <a
href="http://utopia.knoware.nl/~hlub/rlwrap/">rlwrap</a>. It wraps the
readline library over just about any interactive text input
program. The readline library provides basic editing and history. It's
handy for those programs that don't provide their own line editing
facilities.
</p>
<p>
It tries to be as transparent as possible, detecting yes/no prompts
and passwords, so it should still be reasonable under those
conditions.
</p>
<p>
If you can't think of anything to try it with, try it with
<code>cat</code>. Instant line editor!
</p>
<pre>
rlwrap cat > some-file.txt
</pre>
<p>
Or with Festival.
</p>
<pre>
rlwrap festival --tts
</pre>
<p>
It will also turn incorrectly compiled shells on your system into
something usable. On my system (Debian GNU/Linux), <code>csh</code>
isn't usable without <code>rlwrap</code>.
</p>
<pre>
rlwrap csh
</pre>
]]>
    </content>
  </entry>


  <entry>
    <title>Movie DNA</title>
    <link rel="alternate" type="text/html" href="https://nullprogram.com/blog/2007/12/11/"/>
    <id>urn:uuid:fea3c63e-1d62-3670-770a-832987093f4b</id>
    <updated>2007-12-11T00:00:00Z</updated>
    <category term="trick"/>
    <content type="html">
      <![CDATA[<p>Update: A <a href="/blog/2007/12/26/">follow-up of this post</a> has a script that can do
the montage part the job much faster than ImageMagick.</p>

<p>Brendan Dawes has this interesting idea he calls
<a href="http://www.brendandawes.com/sketches/redux/">Cinema Redux</a>. A entire film is distilled down to a single
image. You take one frame from each second of the movie, shrink that
frame down to 8x6 pixels, then line them up in a montage with 60
frames per row. Each row then represents one minute of film. There are
8 examples on his website.</p>

<p>I was interested in trying this for myself, but I couldn’t find any of
his code, which he had written in Java, to do it myself. Then it hit
me: I really don’t need to write <em>anything</em> to do this! Here is
how you can make your own using only two tools: <a href="http://www.mplayerhq.hu/">mplayer</a> and
<a href="http://www.imagemagick.org/">ImageMagick</a>.</p>

<p>Originally I thought that I may need to write a small Perl script to
glue these two things together, but found, after digging
though <code class="language-plaintext highlighter-rouge">man</code> pages, that this was completely
unnecessary. There are two steps involved and each tool does one step:
grab all of the frames, and second, make a montage out of those
frames. Grabbing the frames is one call to <code class="language-plaintext highlighter-rouge">mplayer</code>,</p>

<div class="language-plaintext highlighter-rouge"><div class="highlight"><pre class="highlight"><code>mplayer -vo jpeg:outdir=frames -ao dummy -vf framestep=30,scale=8:6 \
        &lt;video_file&gt;
</code></pre></div></div>

<p>What we are doing here is dumping every 30th frame (assuming 30
frames-per-second) into a directory named <code class="language-plaintext highlighter-rouge">frames</code>. These
images will be named by consecutive 8-digit numbers. These frames are
also resized down to 8x6 pixels. If you are converting a video with a
different aspect ratio, such as a wide-screen movie without
letter-boxing, you will need to adjust this. A wide-screen film would
be 16x9.</p>

<p>Next, we glue these frames together with ImageMagick,</p>

<div class="language-plaintext highlighter-rouge"><div class="highlight"><pre class="highlight"><code>montage -geometry +0+0 -background black -tile 60x "frames/*jpg" \
        montage.jpg
</code></pre></div></div>

<p>This will create the montage in the file <code class="language-plaintext highlighter-rouge">montage.jpg </code>.
There is something important to note here. See how the file glob is
quoted so that the shell will not expand it? Thats because listing
7000 frames pushes the limits of the system in passing command line
arguments. ImageMagick knows about file globs and will do this
internally.</p>

<ul>
  <li><a href="/download/cinrdx.sh">/download/cinrdx.sh</a></li>
</ul>

<p>And that’s it! I put these together into that handy shell script that
will also remove the frames after the montage has been successfully
created. The process takes between 6 and 12 hours, depending on the
length of the movie. It takes the movie running time to produce all
the frames file, then it spends the rest of the time creating the
montage, which is disappointingly slow. (Maybe I could write a Perl
script that does it faster?) The script will create a montage out of
just about any video you throw at it, thanks to <code class="language-plaintext highlighter-rouge">mplayer</code>. Example
usage for DVDs,</p>

<div class="language-plaintext highlighter-rouge"><div class="highlight"><pre class="highlight"><code>$ ./cinrdx.sh dvd://
</code></pre></div></div>

<p>I did it on three movies so far: <em>Gladiator</em>, <em>Tron</em>, and <em>The
Matrix</em>. I did it to <em>Tron</em> and <em>The Matrix</em> because I wanted to see
if these movies have a dominant color scheme.</p>

<p><a href="/img/cinrdx/gladiator.jpg"><img src="/img/cinrdx/gladiator-thumb.jpg" alt="" /></a></p>

<p><a href="/img/cinrdx/tron.jpg"><img src="/img/cinrdx/tron-thumb.jpg" alt="" /></a></p>

<p><a href="/img/cinrdx/matrix.jpg"><img src="/img/cinrdx/matrix-thumb.jpg" alt="" /></a></p>

<p>To inspect the coloring of these films, I took a hue histogram. <em>Tron</em>
is very obvious: lots of blues and cyans dominate,</p>

<p><img src="/img/cinrdx/tron-hist.png" alt="" /></p>

<p>I was expecting to see a lot of green show up in <em>The Matrix</em>, but was
a little bit disappointed,</p>

<p><img src="/img/cinrdx/matrix-hist.png" alt="" /></p>

<p>To get these histograms, I loaded the images into GNU Octave,
converted it to HSV so that the red channel is really the hue channel.
Then I had the GIMP make the histograms by providing the histogram of
the “red” (read hue) channel. I dropped an HSV color bar below with
some image editing.</p>

<div class="language-plaintext highlighter-rouge"><div class="highlight"><pre class="highlight"><code>octave&gt; m = imread("movie.jpg");
octave&gt; [x map] = rgb2ind(m);
octave&gt; map = rgb2hsv(map);
octave&gt; imwrite("movie-hsv.jpg", x, map);
</code></pre></div></div>

<p>See if you can find some really interesting things to do with this.</p>

]]>
    </content>
  </entry>


  <entry>
    <title>PNG Archiver - Share Files Within Images</title>
    <link rel="alternate" type="text/html" href="https://nullprogram.com/blog/2007/09/08/"/>
    <id>urn:uuid:1e1c84f7-c43b-3cef-80a2-d78b48a2e51b</id>
    <updated>2007-09-08T00:00:00Z</updated>
    <category term="c"/><category term="trick"/>
    <content type="html">
      <![CDATA[<p>This is one of my projects.</p>

<ul>
  <li><a href="https://github.com/skeeto/pngarch">PNG Archiver</a></li>
</ul>

<p>The original idea for this project came
from Sean Howard’s <a href="http://www.squidi.net/three/entry.php?id=12">Gameplay Mechanic’s #012</a>. The basic
idea here is that image files are the second easiest type of data to
share on the Internet (the first being text). Sharing anything other
than images may be difficult, so why not store files within an image
as the image data? This is not <a href="http://en.wikipedia.org/wiki/Steganography">steganography</a> as the data is
not being hidden. In fact, the data is quite obvious because we are
trying to make the data as compact as possible in the image.</p>

<p>My “PNG Archiver” is usable but should still be considered alpha
quality software. I am adding support for different types of PNGs
(currently it does 8-bit RGB only), but I have found that using the
libpng library gives me headaches. The archiver can actually only
store a single file (just as gzip doesn’t know what a file is). This
is because I do not want to duplicate the work of real file archivers
like <code class="language-plaintext highlighter-rouge">tar</code>. To store multiple files, make a “png-tarball”.</p>

<p>The PNG Archiver stores a checksum in the image that allows it to
verify that the data was received correctly. This also allows it to
automatically scan the image for data. When it reads in a piece that
fulfills the checksum it assumes that it found the data you are
looking for. You can decorate the image with text or a border and the
archiver should still find the data as long as you didn’t disturb it.
(examples of this on the project page)</p>

]]>
    </content>
  </entry>


</feed>
