nullprogram.com/blog/2011/11/19/
Update January 2013: I’ve learned more about Java dependency
management and no longer use my old .ant repository. As a result, I
have deleted it, so ignore any references to it below. The only thing
I keep in $HOME/.ant/lib these days is an up-to-date ivy.jar.
Last month I started managing my entire Emacs configuration in
Git, which has already paid for itself by saving
me time. I found out a few other people have been using it (including
Brian), so I also wrote up a README
file describing my
specific changes.
With Emacs being a breeze to synchronize between my computers, I
noticed a new bottleneck emerged: my .ant
directory. Apache Ant puts everything in
$ANT_HOME/lib and $HOME/.ant/lib into its classpath. So, for
example, if you wanted to use JUnit with Ant,
you’d toss junit.jar in either of those directories. $ANT_HOME
tends to be a system directory, and I prefer to only modify system
directories indirectly through apt, so I put everything in
$HOME/.ant/lib. Unfortunately, that’s another directory to keep
track of on my own. Fortunately, I already know how to deal with
that. It’s now another Git repository,
https://github.com/skeeto/.ant
(README)
With that in place, settling into a new computer for development is
almost as simple as cloning those two repositories. Yesterday I took
the step to eliminate the only significant step that remained:
setting up java-docs. Before you could really
take advantage of my Java extension, you really needed to have a
Javadoc directory scanned by Emacs. The results of that scan not only
provided an easy way to jump into documentation, but also provided the
lists for class name completion. Now, java-docs now automatically
loads up the core Java Javadoc, linking to the official website, if
the user never sets it up.
So if you want to see exactly how my Emacs workflow with Java
operates, it’s just a few small steps away. This should work for any
operating system suitable for Java development.
Let’s start by getting Java set up. First, install a JDK and Apache
Ant. This is trivial to do on Debian-based systems,
sudo apt-get install openjdk-6-jdk ant
On Windows, the JDK is easy, but Ant needs some help. You probably
need to set ANT_HOME to point to the install location, and you
definitely need to add it to your PATH.
Next install Git. This should be straightforward; just make sure its
in your PATH (so Emacs can find it).
Clone my .ant repository in your home directory.
cd
git clone https://github.com/skeeto/.ant.git
Except for Emacs, that’s really all I need to develop with Java. This
setup should allow you to compile and hack on just about any of my
Java projects. To test it out, anywhere you like clone one of my
projects, such as my
example project.
git clone https://github.com/skeeto/sample-java-project.git
You should be able to build and run it now,
cd sample-java-project
ant run
If that works, you’re ready to set up Emacs. First, install Emacs. If
you’re not familiar with Emacs, now would be the time to go through
the tutorial to pick up the basics. Fire it up and type CTRL + h and
then t (in Emacs’ terms: C-h t), or select the tutorial from the
menu.
Move any existing configuration out of the way,
mv .emacs .old.emacs
mv .emacs.d .old.emacs.d
Clone my configuration,
git clone https://github.com/skeeto/.emacs.d.git
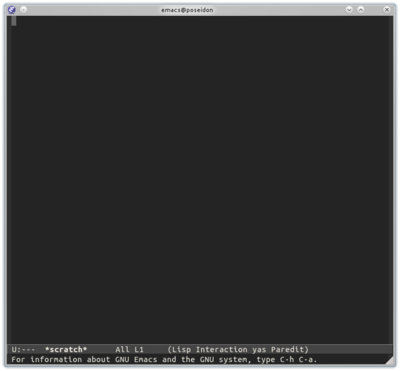
Then run Emacs. You should be greeted with a plain, gray window: the
wombat theme. No menu bar, no toolbar, just a minibuffer, mode line,
and wide open window. Anything else is a waste of screen real
estate. This initial empty buffer has a great aesthetic, don’t you
think?
Now to go for a test drive: open up that Java project you cloned, with
M-x open-java-project. That will prompt you for the root directory
of the project. The only thing this does is pre-opens all of the
source files for you, exposing their contents to dabbrev-expand and
makes jumping to other source files as easy as changing buffers — so
it’s not strictly necessary.
Switch to a buffer with a source file, such as
SampleJavaProject.java if you used my example project. Change
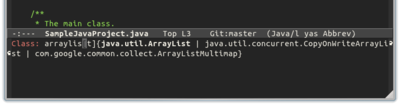
whatever you like, such as the printed string. You can add import
statements at any time with C-x I (note: capital I), where
java-docs will present you with a huge list of classes from which to
pick. The import will be added at the top of the buffer in the correct
position in the import listing.
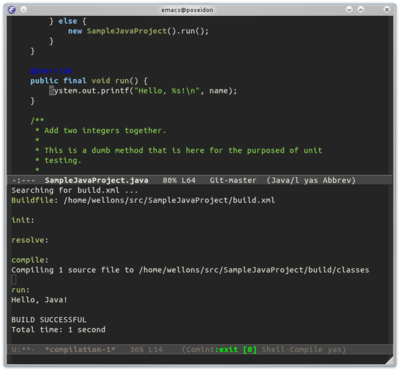
Without needing to save, hit C-x r to run the program from Emacs. A
*compilation-1* buffer will pop up with all of the output from Ant
and the program. If you just want to compile without running it, type
C-x c instead. If there were any errors, Ant will report them in the
compilation buffer. You can jump directly to these with C-x `
(that’s a backtick).
Now open a new source file in the same package (same directory) as the
source file you just edited. Type cls and hit tab. The boilerplate,
including package statement, will be filled out for you by
YASnippet. There are a bunch of completion snippets available. Try
jal for example, which completes with information from java-docs.
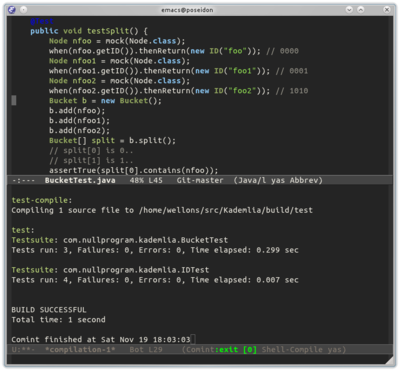
When I’m developing a library, I don’t have a main function, so
there’s nothing to “run”. Instead, I drive things from unit tests,
which can be run with C-x t, which runs the “test” target if there
is one.
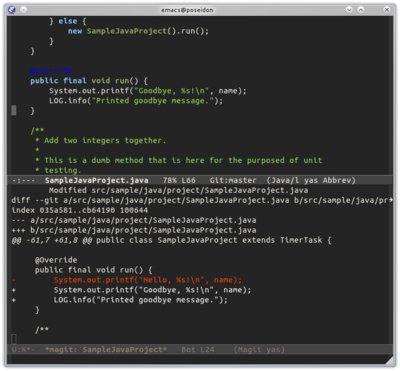
To see your changes, type C-x g to bring up Magit and type M-s in
the Magit buffer (to show a full diff). From here you can make
commits, push, pull, merge, switch branches, reset, and so on. To
learn how to do all this, see the
Magit manual. You
can type q to exit the Magit window, or use S-<arrow key> to move
to an adjacent buffer in any direction.
And that’s basically my workflow. Developing in C is a very similar
process, but without the java-docs part.